Writing a Mac app to review my photos
I take a lot of photos. When I’m trying to get a particular shot, I’ll often take multiple pictures in the hope of getting at least one that’s good – and then my camera roll is full of similar images.
I always intend to go back and clean up my pictures afterwards – pick the best version of each shot, and delete all the rest. In practice, I’ve struggled to do this review step – I had no good way to track my progress, to know what I’d already reviewed and what was new.
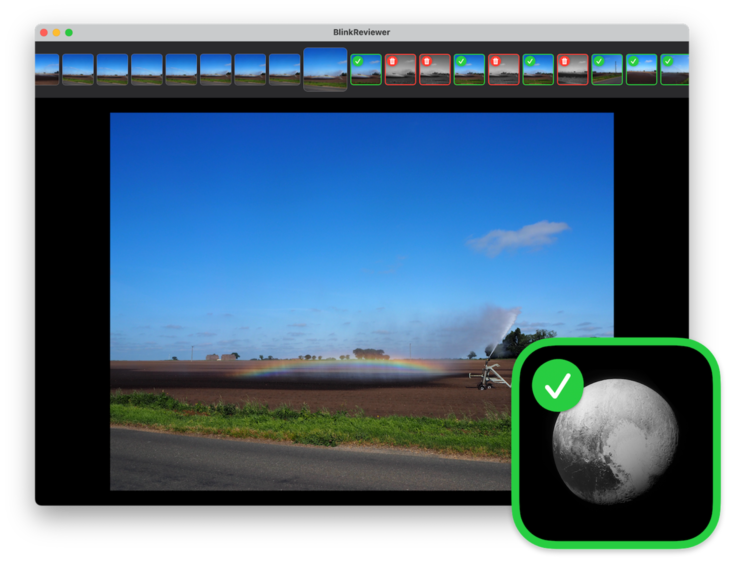
Recently, I made myself a little Mac app to make it easier to review my photos. I see all my pictures in a horizontally scrolling list, I can go back and forth with the arrow keys, and I can use the keyboard to review a photo into one of three states.
Most photos I review as Approved or Rejected, but I can also mark a photo as Needs Action. I mark a photo this way when I need to do something with it, and I don’t just want to keep it forever or delete it immediately – useful, for example, for all the screenshots I’ve saved that should be turned into bug reports.
I can also add other categories. In particular, I take a lot of photos of my cross-stitch projects, and I have an album with all of them. I can add new photos to that album with one keystroke.
I started with a prototype in Python, Flask, and JavaScript, which ran as a web app in my browser. I could use the keyboard to navigate, and the Python app would run scripts written in Swift to modify my Photos library and retrieve the actual images.
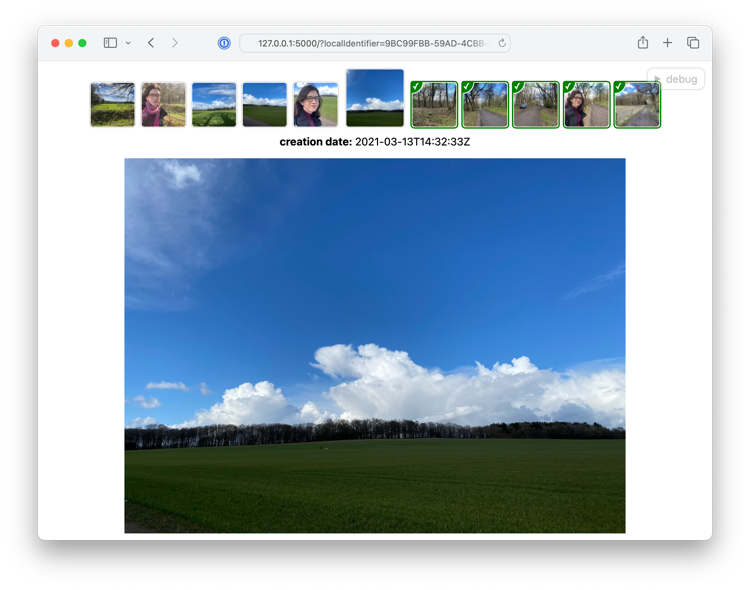
It proved the concept, but it was quite slow – running Swift from Python introduces noticeable latency. To fix the latency problem, I tossed around a bunch of ideas for some sort of persistently-running Swift process, or inventing a clever way for the Python server and Swift script to communicate – for some reason I was trying to avoid writing a proper Mac app.
Writing Mac apps has always felt a bit intimidating, and I’m not sure why. I think maybe I tried when I had much less experience, found it too hard, and the feeling stuck? The last time I remember using Xcode, the language of choice was Objective‑C – which means this was pre-Swift, and that came out nearly a decade ago.
I’ve written a little Swift, and I know the modern way to write UIs for Apple platforms is SwiftUI, so I looked at the SwiftUI tutorial. It’s a pretty good tutorial, and I was able to follow it easily. I’ve been using React for some front-end work in the last year or so, and I think that really helped – I saw a lot of parallels between SwiftUI views and React components. Some of the more complicated bits with @State and @Binding I don’t think I’ve fully internalised yet, but I’ll get there.
I bailed about halfway through the tutorial, and started writing my photo reviewing app. I was pleasantly surprised at how quickly I could get something running, and I had the basic functionality within a few days. There are lots of bugs and rough edges, but it kinda works.
One of the things I like about SwiftUI is the number of Apple-provided design resources I get to use “for free”. The red/green in the web app were fairly ugly CSS colours (#ff0000 and #008800); the red/green in the SwiftUI app are from Apple’s professionally designed system palette. I’ve also got a chance to use SF Symbols, their icon set, and most of the padding/spacing is just the defaults. I really like how the app looks, and I think it’s because I outsourced a lot of the design choices. 😅
It’s also pretty snappy; switching between photos or reviewing a picture are near-instant. I used it after coming back from a short break in Ely, where I took several hundred photos, and I chewed through them all in a couple of hours.
I have no immediate plans to write about what I’m doing with Swift and SwiftUI, just because I’m still learning and I don’t know what good/useful looks like yet. (I have been learning what bad looks like! My thumbnail picker is already on its fourth rewrite, because I kept writing implementations which were slow or broken.)
I’ll write about some of it eventually, because I’ll to keep using Swift and SwiftUI – now I’ve tried it, the prospect of creating other small utilities is too tempting. This won’t be my last Mac app.
The app is already good enough for me to review my photos on a day-to-day basis, even if it has some rough edges. It’s not ready for anyone else to use – among other things, it’ll probably crash if you don’t use it with my Photos library – but I’m going to keep improving it, as a fun learning exercise as much as anything else.
I might release proper binaries at some point, but in the meantime, everything is open-source and in a public GitHub repository. That includes the code, more documentation, and an explanation of why I chose the name and icon that I did.