Over the last year or so, I’ve been creating static websites to browse my local archives. I’ve done this for a variety of collections, including:
- paperwork I’ve scanned
- documents I’ve created
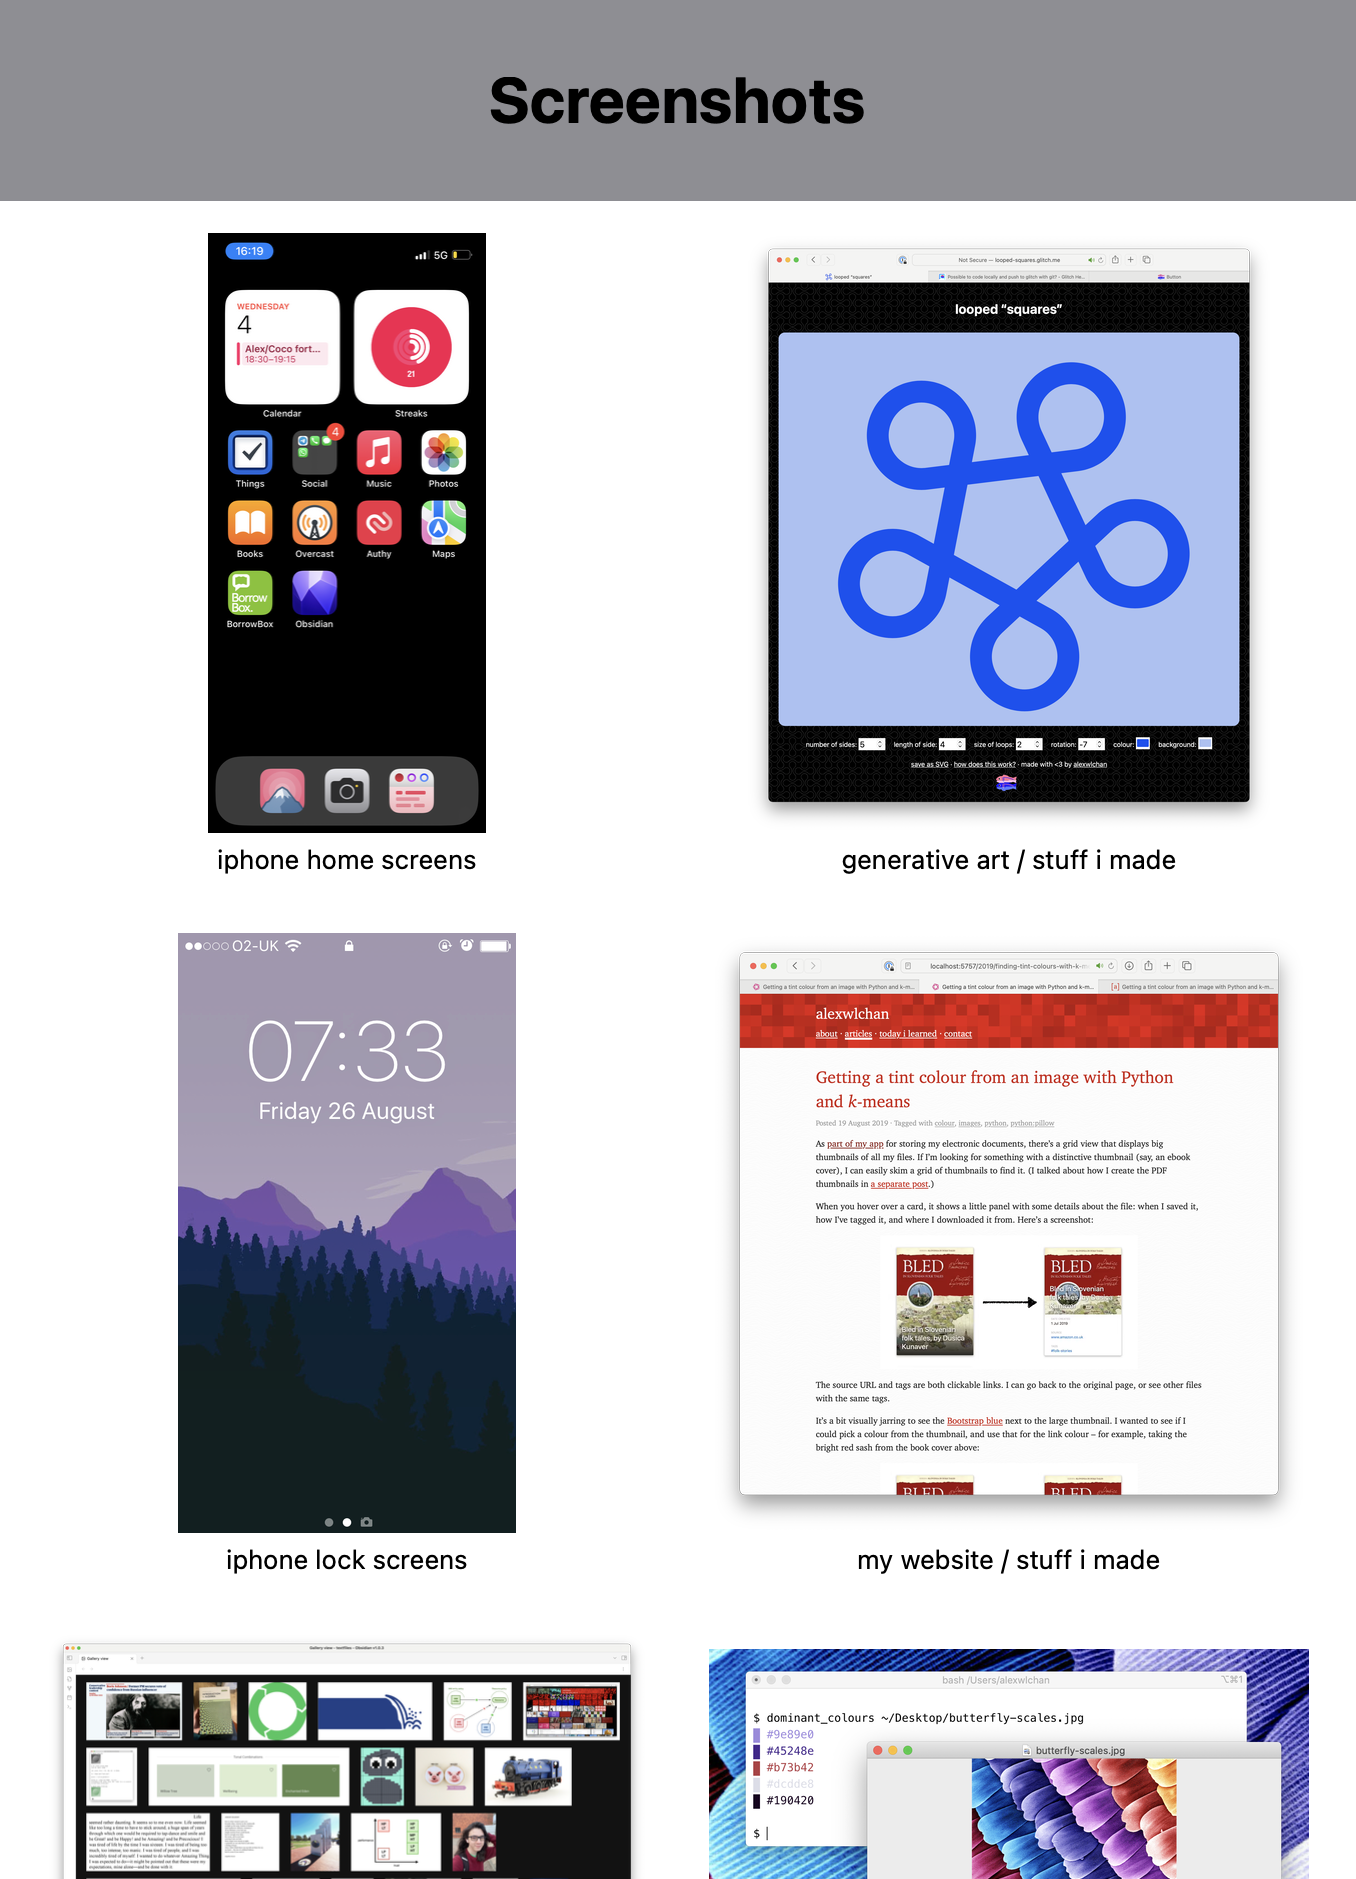
- screenshots I’ve taken
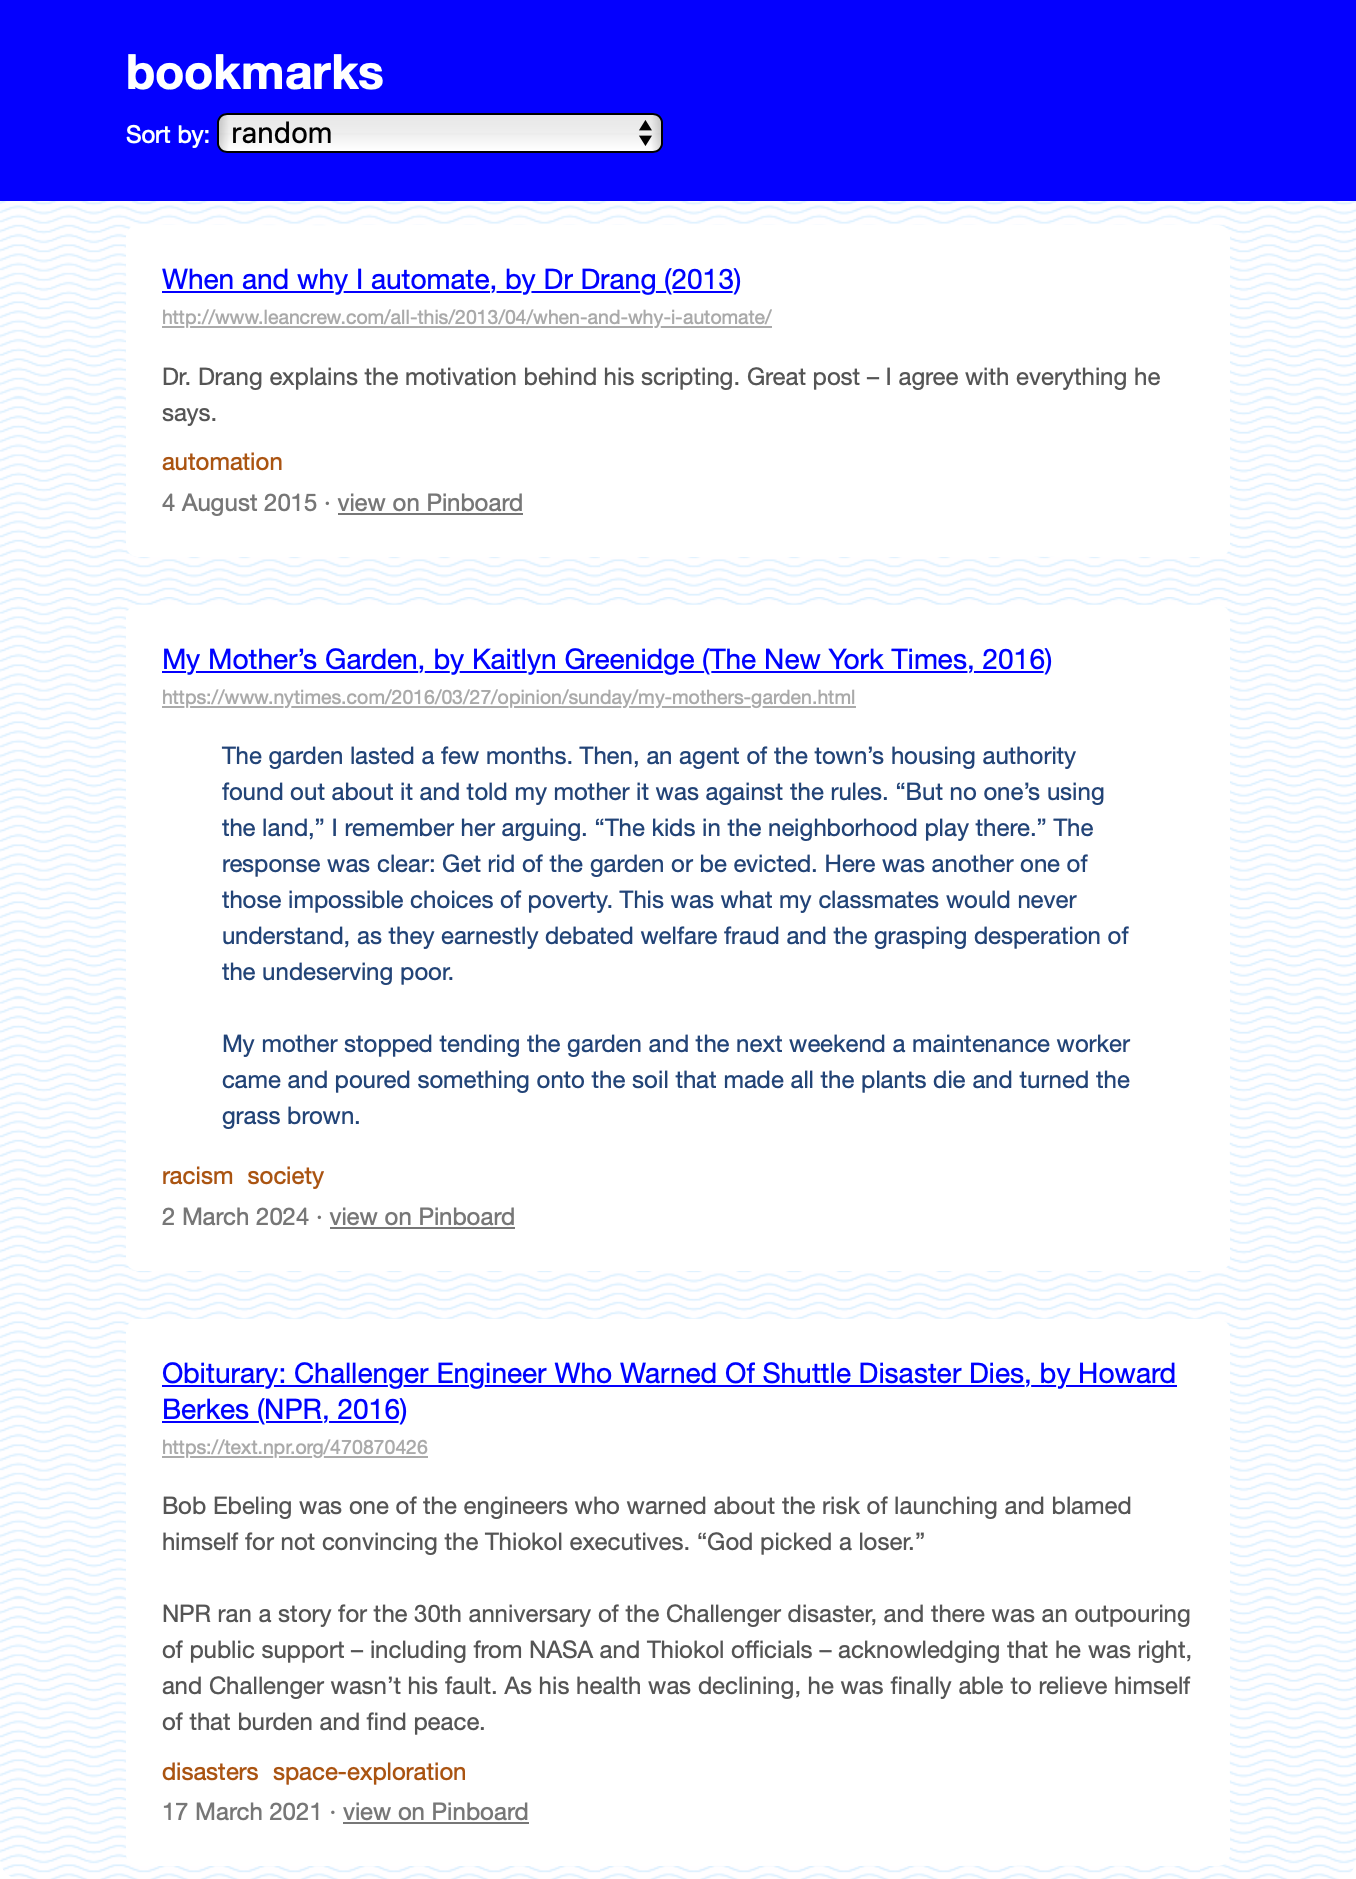
- web pages I’ve bookmarked
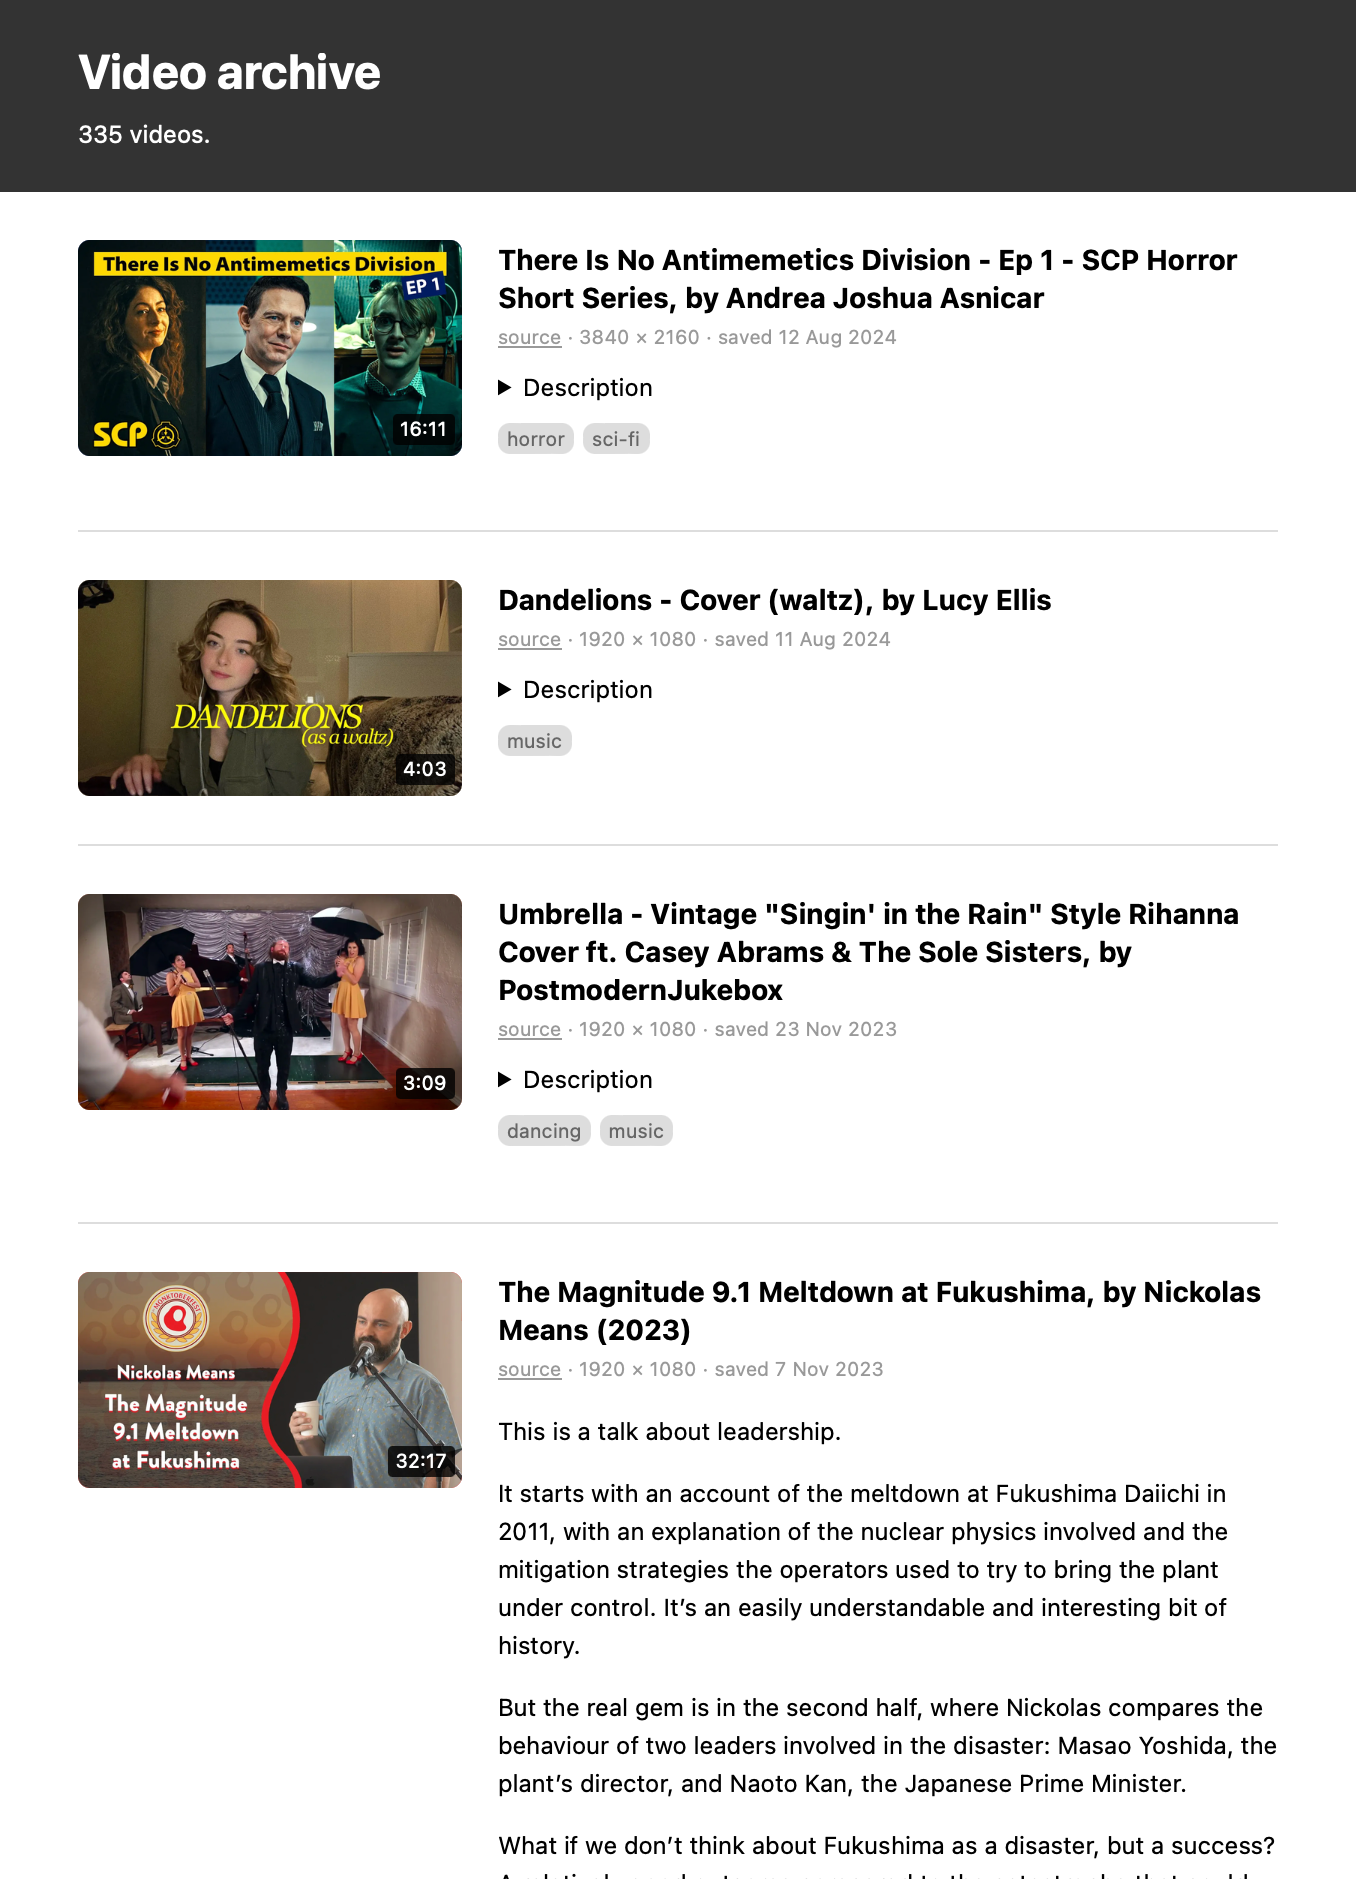
- video and audio files I’ve saved
I create one website per collection, each with a different design, suited to the files it describes. For example, my collection of screenshots is shown as a grid of images, my bookmarks are a series of text links, and my videos are a list with a mixture of thumbnails and text.
These websites aren’t complicated – they’re just meant to be a slightly nicer way of browsing files than I get in the macOS Finder. I can put more metadata on the page, and build my own ways to search and organise the files.
Each collection is a folder on my local disk, and the website is one or more HTML files in the root of that folder. To use the website, I open the HTML files in my web browser.
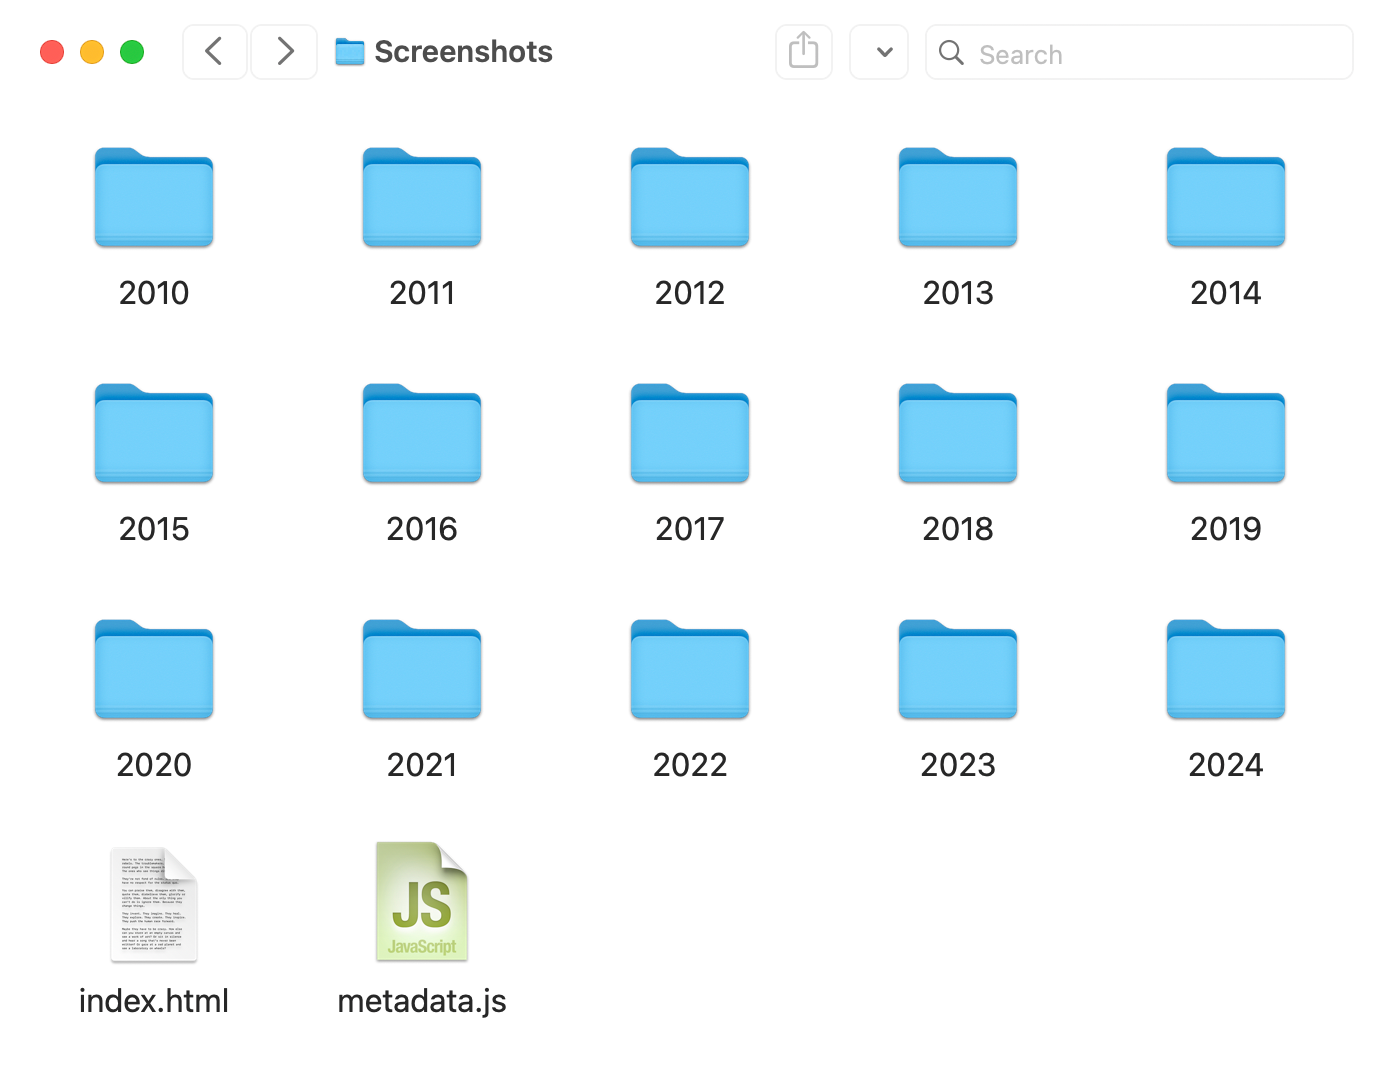
metadata.js, and I can double-click index.html to open the file in my browser and use the website.
The HTML file uses the metadata to render the grid of images.
I’m deliberately going low-scale, low-tech. There’s no web server, no build system, no dependencies, and no JavaScript frameworks. I’m writing everything by hand, which is very manageable for small projects. Each website is a few hundred lines of code at most.
Because this system has no moving parts, and it’s just files on a disk, I hope it will last a long time. I’ve already migrated a lot of my files to this approach, and I’m pleased with how it’s going. I get all the simplicity and portability of a file full of folders, with just a bit of extra functionality sprinkled on top.
How did I get to static websites?
Before static websites, I tried other approaches for organising my files, but they never stuck.
I’ve made several attempts to use files and folders, the plain filesystem. Where I always struggled is that folders require you to use hierarchical organisation, and everything has to be stored in exactly one place. That works well for some data – all my code, for example – but I find it more difficult for media. I could never design a hierarchy that I was happy with. I’d stall on organising files because I was unsure of which folder to put them in, and I ended up with a disorganised mess of a desktop.
I much prefer the flexibility of keyword tagging. Rather than put a file in a single category, I can apply multiple labels and use any of them to find the file later. The macOS Finder does support tagging, but I’ve always found its implementation to be a bit lacklustre, and I don’t want to use it for anything serious.
When I was younger, I tried “everything buckets” like DEVONThink, Evernote, and Yojimbo. I know lots of people like this sort of app, but I could never get into them. I always felt like I had to wrap my brain around the app’s way of thinking – changing myself to fit the app’s approach, not the other way round.
Once I had some programming experience, I tried writing my own tools to organise my files. I made at least a dozen attempts at this, the last of which was docstore. Building my own tool meant I got something that was a closer match to my mental model, but now I was on the hook for maintenance. Every time I upgraded Python or updated macOS, something would break and I’d have to dive into the the code to fix it. These tools never required a lot of ongoing work, but it was enough to be annoying.
Every time I gave up on an app, I had another go at using plain files and folders. They’re the default way to organise files on my Mac. They’re lightweight, portable, easy to back up, and I expect to be able to read them for many years to come. But the limited support for custom metadata and keyword tags was always a deal breaker.
At some point I realised I could solve these problems by turning folders into mini-websites. I could create an HTML file in the top-level folder, which could be an index – a list of all the files, displayed with all the custom metadata and tags I wanted.
This allowed me to radically simplify the folder structure, and stop chasing the perfect hierarchy. In these mini-websites, I use very basic folders – files are either grouped by year or by first letter of their filename. I only look at the folders when I’m adding new files, and never for browsing. When I’m looking for files, I always use the website. The website can use keyword tags to let me find files in multiple ways, and abstract away the details of the underlying folders.
HTML is low maintenance, it’s flexible, and it’s not going anywhere. It’s the foundation of the entire web, and pretty much every modern computer has a web browser that can render HTML pages. These files will be usable for a very long time – probably decades, if not more.
(I still have the first website I made, for a school class in 2006. It renders flawlessly in a modern browser. I feel safe betting on HTML.)
Emphasis on “tiny”
I’m doing a lot of this by hand – organising the files, writing the metadata, building the viewers. This doesn’t scale to a large collection. Even storing a few hundred items this way takes a non-trivial amount of time – but I actually like that.
Introducing a bit of friction is helping me to decide what I really care about saving. What’s worth taking the time to organise properly, and what can’t I be bothered with? If I don’t want to take even a minute to save it, am I going to look at it again? But if I do save something, I’ve become more willing to take time to write proper metadata, in a way that will make it easier to find later.
I used to have large, amorphous folders where I collected en masse. I had thousands of poorly organised files and I couldn’t find anything, so I never looked at what I’d saved. Now I have tiny websites with a few hundred items which are carefully selected and usefully described.
Even though I usually love automation, I’m enjoying some of the constraints imposed by a more manual process.
Prior art
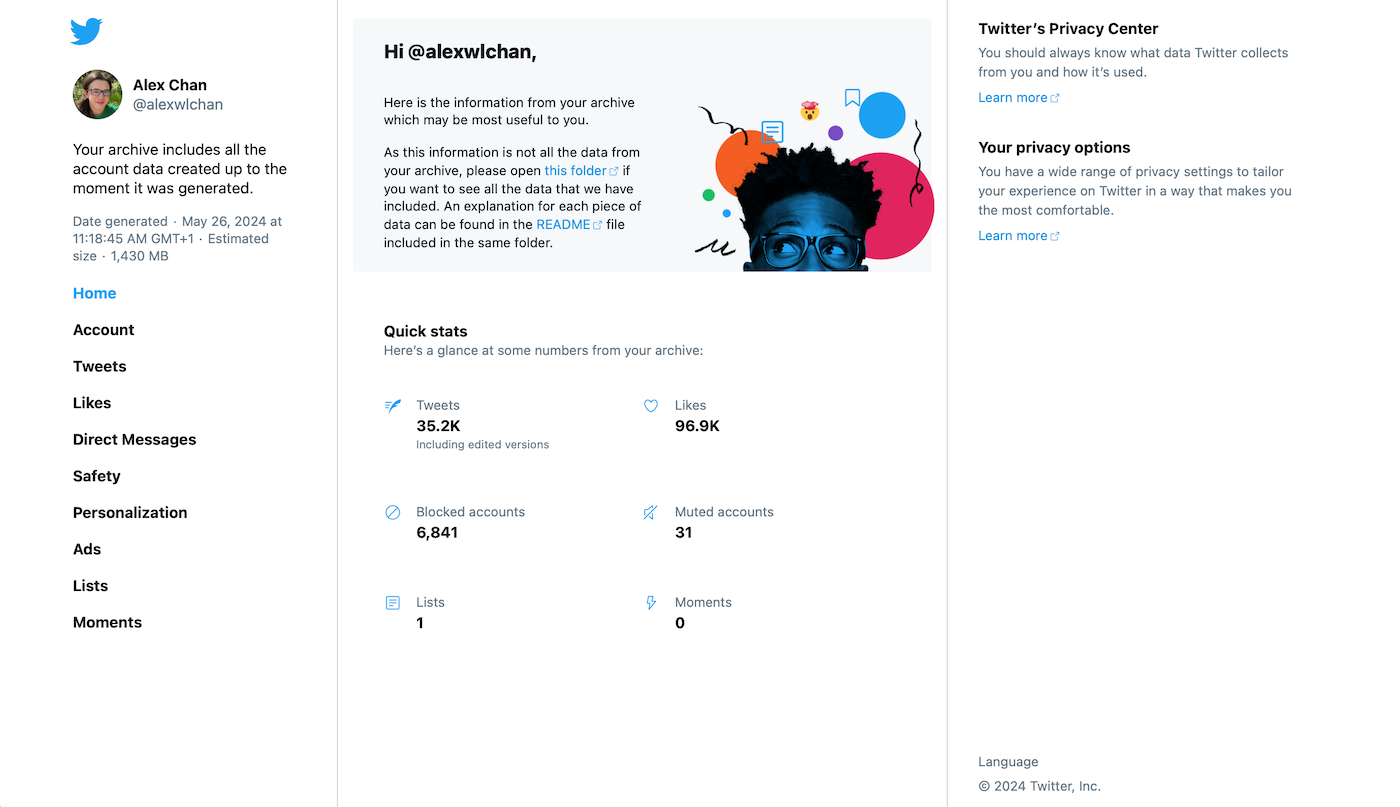
Using a static website like this isn’t new – my inspiration was Twitter’s account export, which gives you a mini-website you can browse locally. I’ve seen several other social media platforms that give you a website as a human-friendly way to browse your data.
I think this could be a powerful idea for digital preservation, as a way to describe born-digital archives. All the benefits of simplicity, longevity, and low maintenance are even more valuable in a memory institution where you want to preserve something for decades or centuries. (And HTML is so low-tech, you can create a basic HTML website on any computer with just the built-in notepad or text editor. No IT support required!)
It’s been exciting to explore this idea at work, where we’re building larger static websites as part of our Data Lifeboat project. This is a way to package up an archival sliver from Flickr. Where my local archives are typically just a list view, the website inside a Data Lifeboat has more pages and functionality. And while I was finishing this article, I saw a post from Ed Summers about creating static sites as a way to preserve Historypin.
I’d love to this static websites get more use as a preservation tool.
I already have a lot of files, which are sprawled across my disk. I’d love to consolidate them all in this new approach, but that would be a tremendous amount of work. My colleague Jessamyn wrote about this in a follow-up to my digital decluttering article: “no one is ever starting at the beginning, not in 2024”.
Rather than moving everything at once, I’m doing a little at a time. As I create new files, I’m saving them into static websites. As I look for older files, I’m pulling them out of their existing storage and moving them into the appropriate static site folder.
I’m enjoying this approach, so I’m going to keep using it. What I particularly like is that the maintenance burden has been essentially zero – once I set up the initial site structure, I haven’t had to do anything to keep it working.
If you’ve never written a website and it’s something you want to try, have a look at Blake Watson’s new book HTML for People. “I feel strongly that anyone should be able to make a website with HTML if they want. This book will teach you how to do just that.”. I love that philosophy. I’m only a third of the way through, but already I can tell this is a great resource.
For a long time, I thought of HTML as a tool for publishing on the web, a way to create websites that other people can look at. But all these websites I’m creating are my local, personal archives – just for me. I’m surprised it took me this long to realise HTML isn’t just for sharing on the web.
[If the formatting of this post looks odd in your feed reader, visit the original article]
]]>


.png)


