Introduction to property-based testing
This is a presentation I gave for the Cambridge Python User Group in June 2016. Notes and the slides are shown below.
The notes aren’t a transcript, just my rough notes of the major points I wanted to cover.
I was speaking for about an hour, so there’s quite a lot of material here. Enjoy!
In this talk, I’ll show you three powerful approaches to automated testing that help you find bugs in your code, but which don’t cost an arm and a leg.
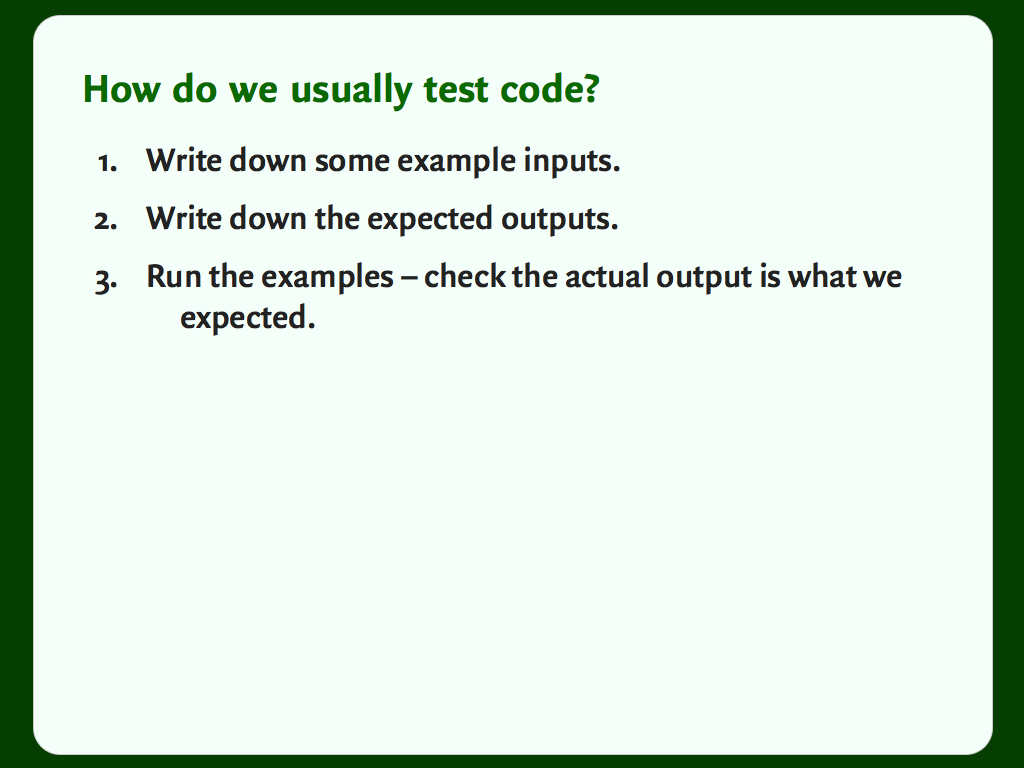
- We start by writing down some example inputs – what sort of inputs do we expect to our function?
- Once we know exactly what the inputs should be, we can write down exactly what the outputs should be.
- Finally, we tell the computer to run through our examples, and check the results are as we expect. Any deviation from the expected output is a failure.
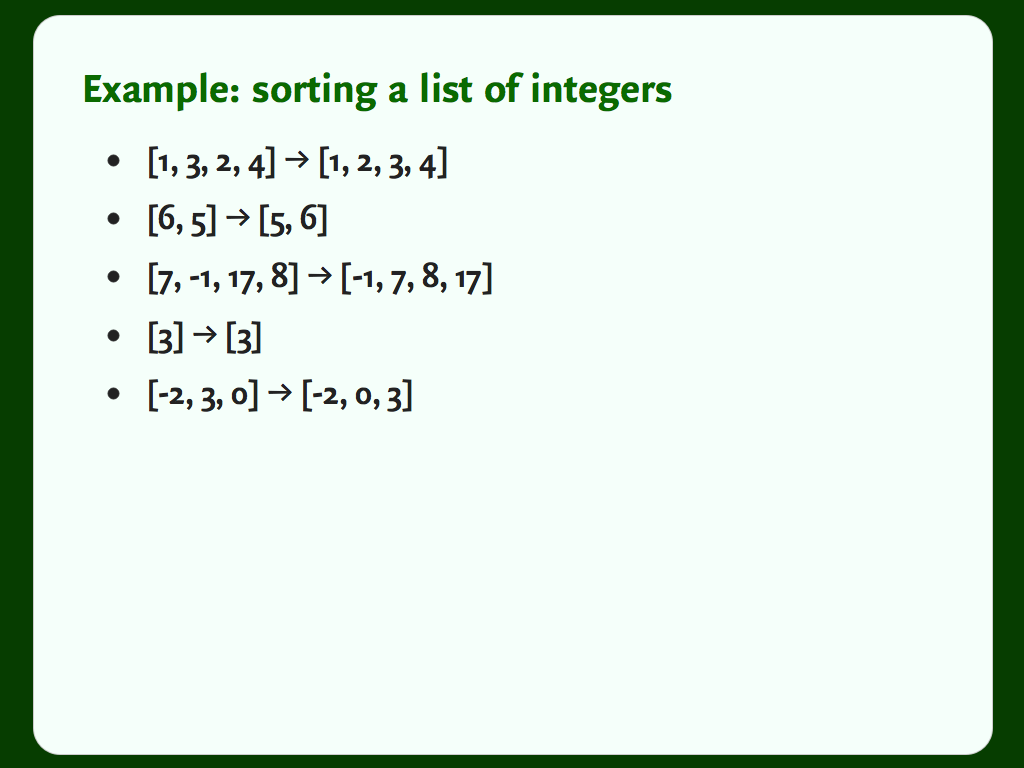
On the left, I’ve written down some example lists. On the right, I’ve written down what those lists look like when they’re sorted. That gives us our test cases.
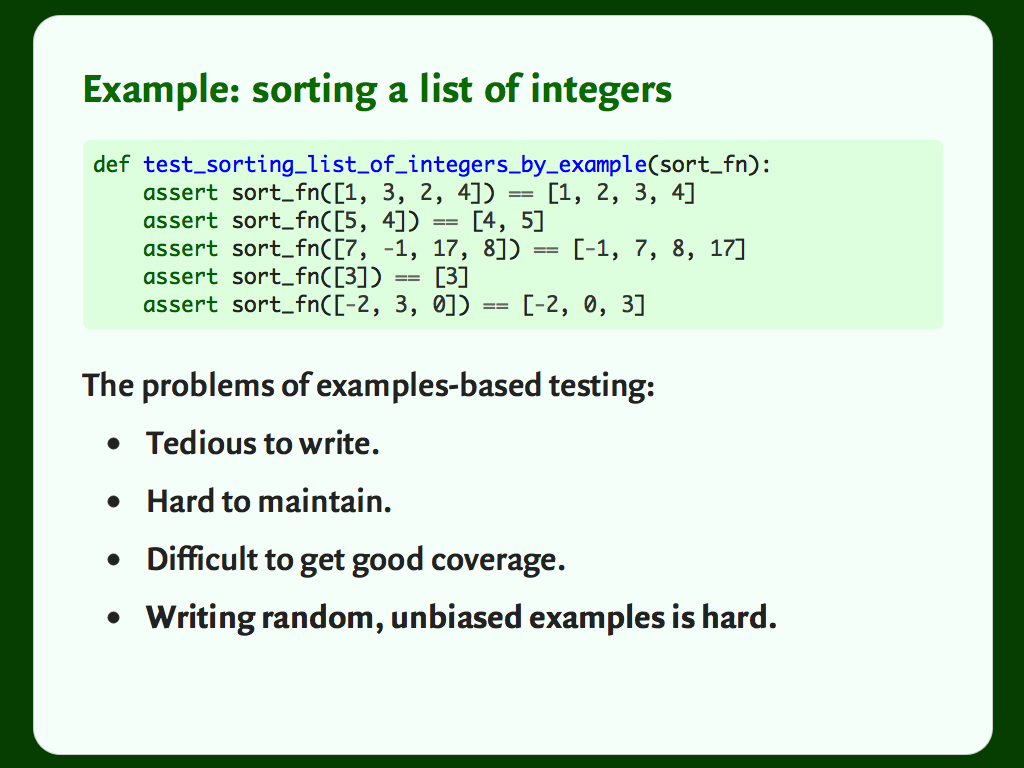
This style of testing has some problems:
Coming up with examples is boring. Somebody has to write them out by hand. If it’s boring, it doesn’t get done.
They’re hard to maintain. We have lots of hard-coded data in our test suite. Lots of magic strings and numbers, and it’s not always obvious when they’re correct.
The big problem is that it’s hard to get good coverage. Not line coverage – there’s coverage.py for that – but getting a good coverage of the input space. All this test tells us is that we have five working examples.
How do we know there isn’t another input where it’s completely broken?
How do we know there aren’t edge cases we’re missing?
(If you write the tests at the same time as the code, will you remember to test an edge case if you forgot to code for it?)
Coming up with a good set of examples is hard. You want something random and unbiased – that gives you a better chance of hitting edge cases, and finding bugs in your code.
Humans are bad at this, so why don’t we ask the computer?
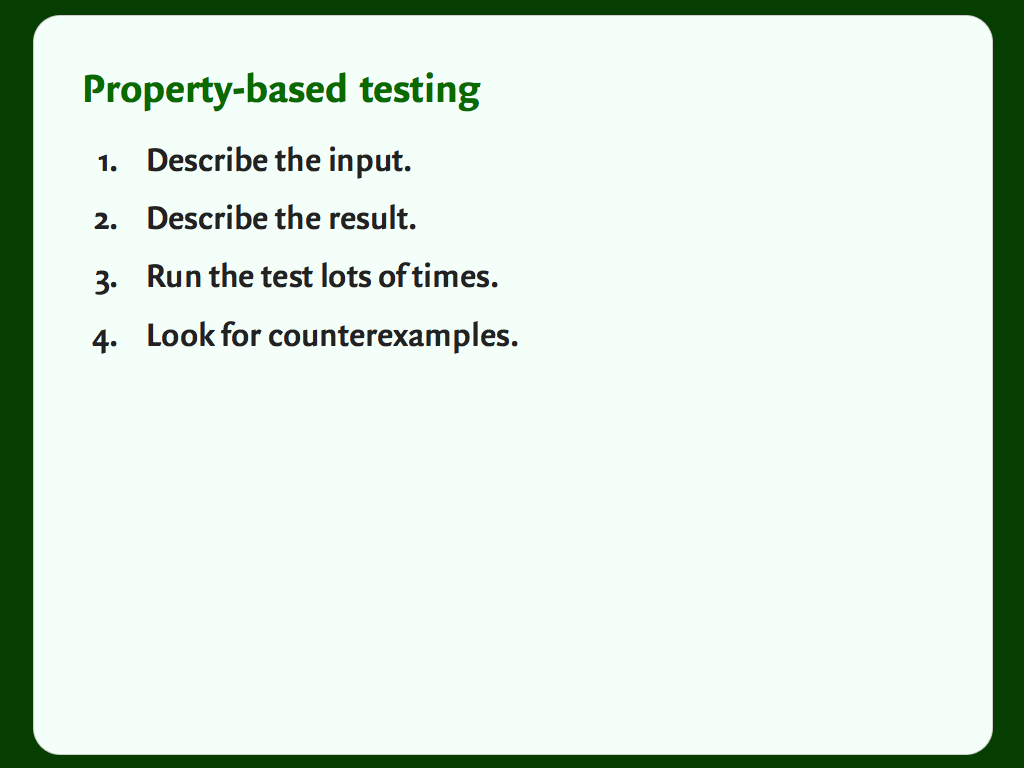
Start by describing the input. Tell the computer what sort of examples we want it to use. The computer will use this to generate random inputs.
Describe the output. Because we don’t know exactly what the input will be, we can’t write down the exact input. We need to give the computer other ways to tell if the test has passed. These are the “properties”.
Run the test lots of times – let the computer draw examples, and check them against our property. It can draw hundreds of examples in a very short time; far more than we could practically write by hand.
This gives us a much more demanding test. Our code has to stand up to hundreds of examples – that makes it much more likely to find a bug (if one exists). If we don’t find a bug, we have much more confidence in our code.
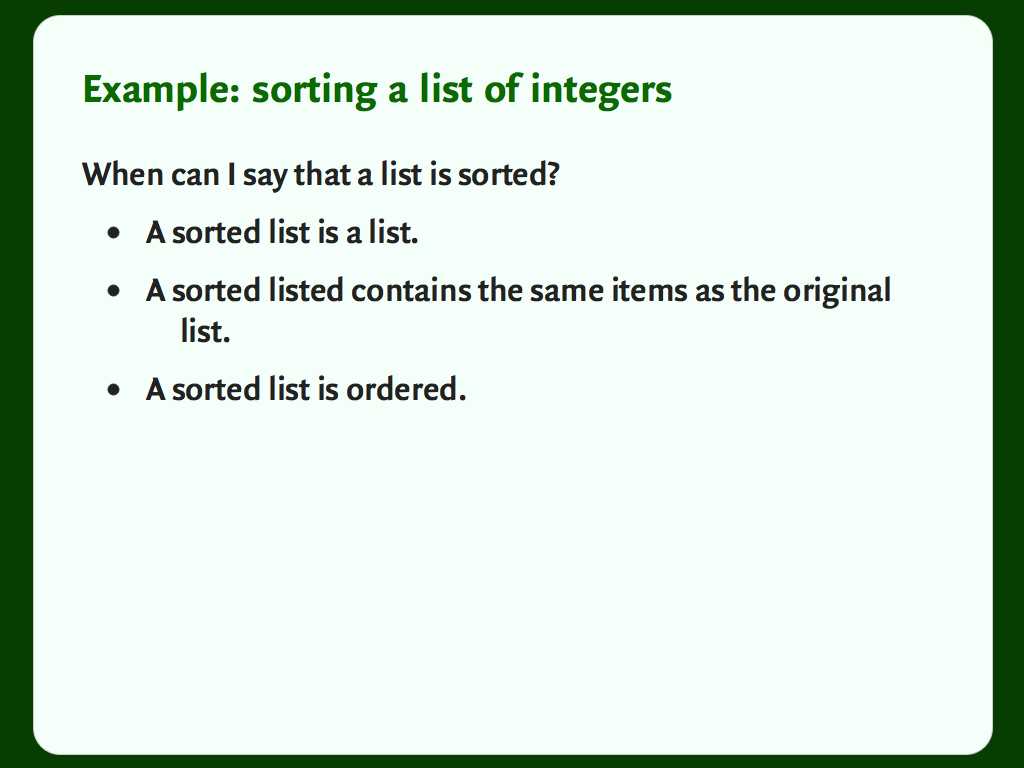
The inputs to this test are in the name – a list of integers – so let’s think about properties. How do I know if a list is sorted?
- A sorted list is a list. If I try to sort a list, and I get back a string, a tuple or a float, something’s gone wrong.
- A sorted list preserves the items in the list. If a sort routine throws away or inserts items, it’s made a mistake.
- A sorted list is ordered: if I compare pairs of adjacent elements, every pair has to be sorted. Anything else is a bug.
These three properties are a much stronger test than the five examples. This defines a sorting routine – if a function passes these three conditions, it sorts a list of integers.
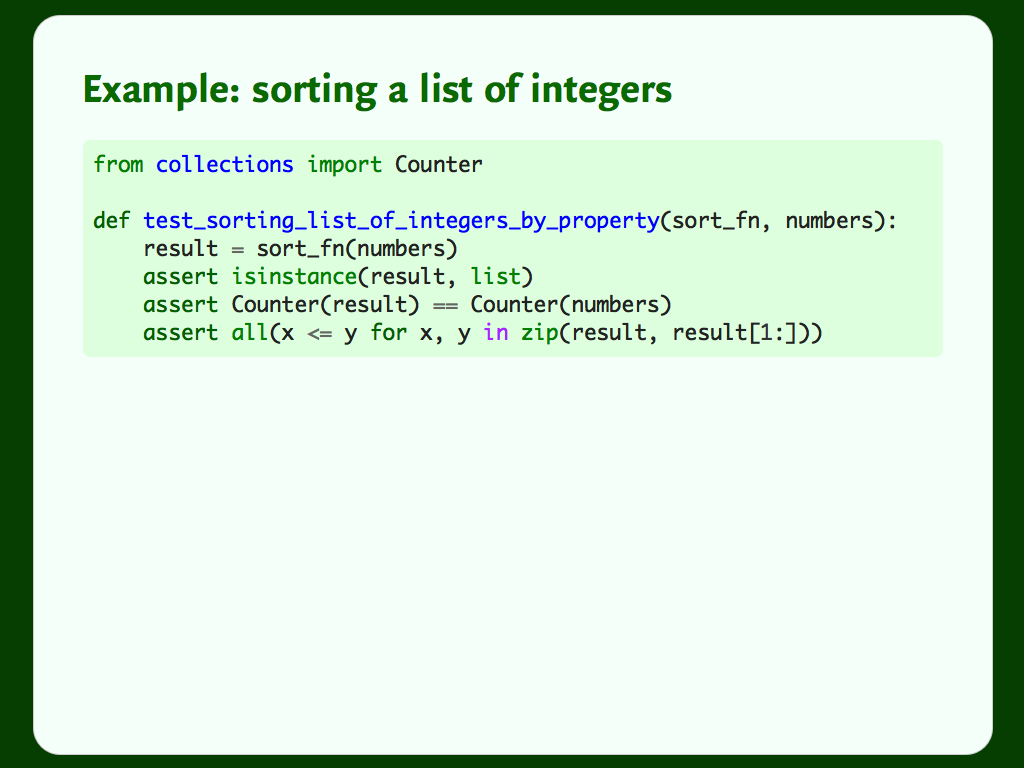
Our test has two arguments: a sort function, and a list of numbers. We’ll provide the first argument, and we’d like the computer to fill in the second. We’d like it to generate lots of random lists of random integers. At this point, we could just break out the random module, but I want to show you an alternative.

When you’re using it for property-based testing, it integrates with all the standard Python test runners, so you can run it alongside your regular unit tests.
It’s inspired by a Haskell library called QuickCheck, which is where the idea of property-based testing originally comes from. This sort of testing has its roots in the world of functional programming.
It’s written by David MacIver, pictured here. I believe David originally wrote this as a way to learn about Python (most people settle for “hello world”), and it sort of… grew.
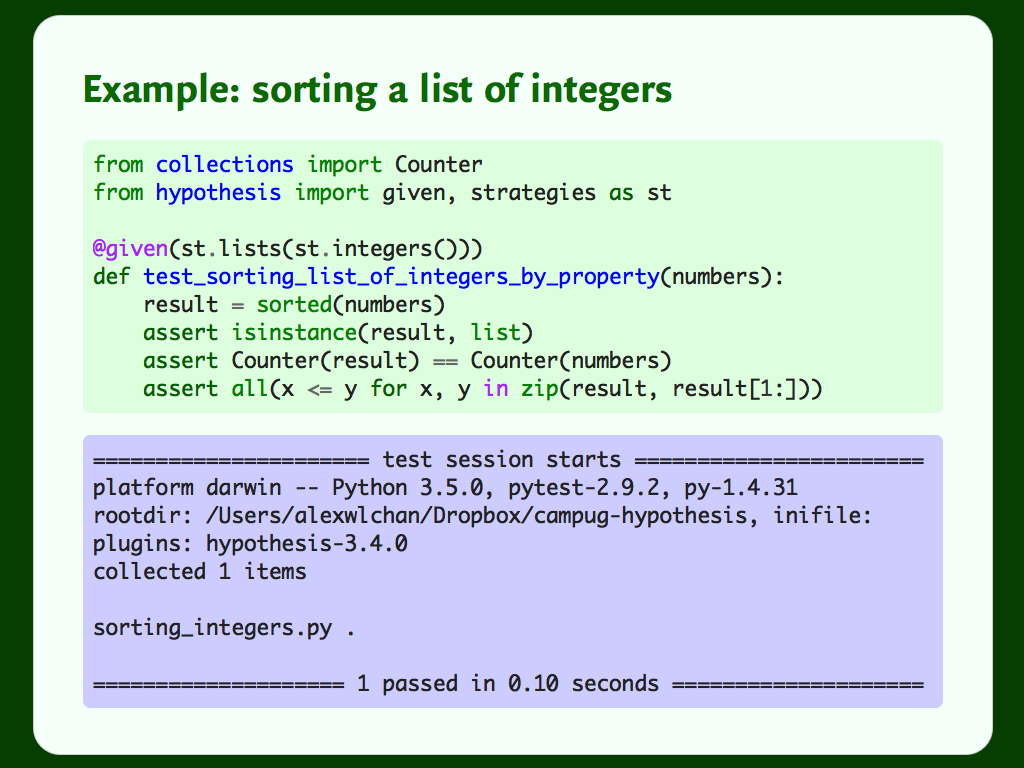
The @given decorator is the entry point to a test with Hypothesis. We supply it with a strategy (in this case, st.lists(st.integers())) and it draws 200 examples. It passes the examples into your test, and sees what happens.
So it’s creating 200 random lists of random integers, and testing them with Python’s builtin sort routine. It checks our sort conditions, and sees if it finds a failure. It doesn’t find a counterexample (probably not surprising), so it lets the test pass. This only shows up as one test case in your test runner, so you don’t get swamped with individual test cases.
If it had found a counterexample, it would fail the test. That prints a single failing example, and registers a failure in your test runner. We’ll see what that looks like shortly.

A strategy is recipe for random data. This is how we describe the input. It tells Hypothesis what sort of examples to create.
Hypothesis can generate examples of all the built-in types: numbers, strings, and so on. When you’re dealing with floating point numbers or Unicode strings, it can actually be hard to come up with the most pathological examples, but Hypothesis can do it for you. It’s also supposed to have good support for generating examples based on Django models, but I don’t use Django so I haven’t tried those features.
It’s really easy to compose strategies – we’ve already seen that, where we composed the list strategy and the integer strategy to create a list of integers. And what if you have custom classes? Easy to create example data with those too.
Finally, strategies know how to shrink themselves. Creating small, easy-to-debug examples is a key feature of property-based testing.
[Note: you can read about all the strategies Hypothesis supports in the docs.]
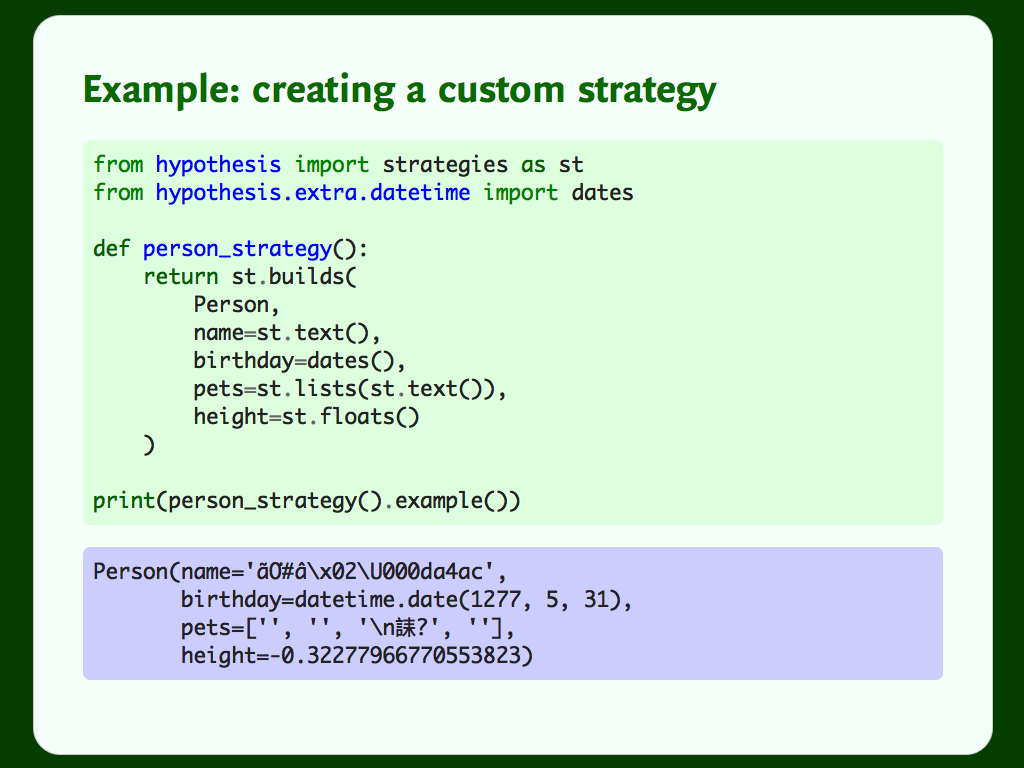
Here I have a Person class that records a few attribute: name, birthday, pets, and height. Maybe I’m making a Facebook for pet owners.
The builds strategy lets me build a strategy from my Person class: the first argument is a target, and then the subsequent args and kwargs are passed into the class constructor. Voila: a strategy that creates instances of the Person class.
But the examples are pretty messy. You can tune strategies to get data that fits your application: you don’t just have to accept all text, or all numbers.
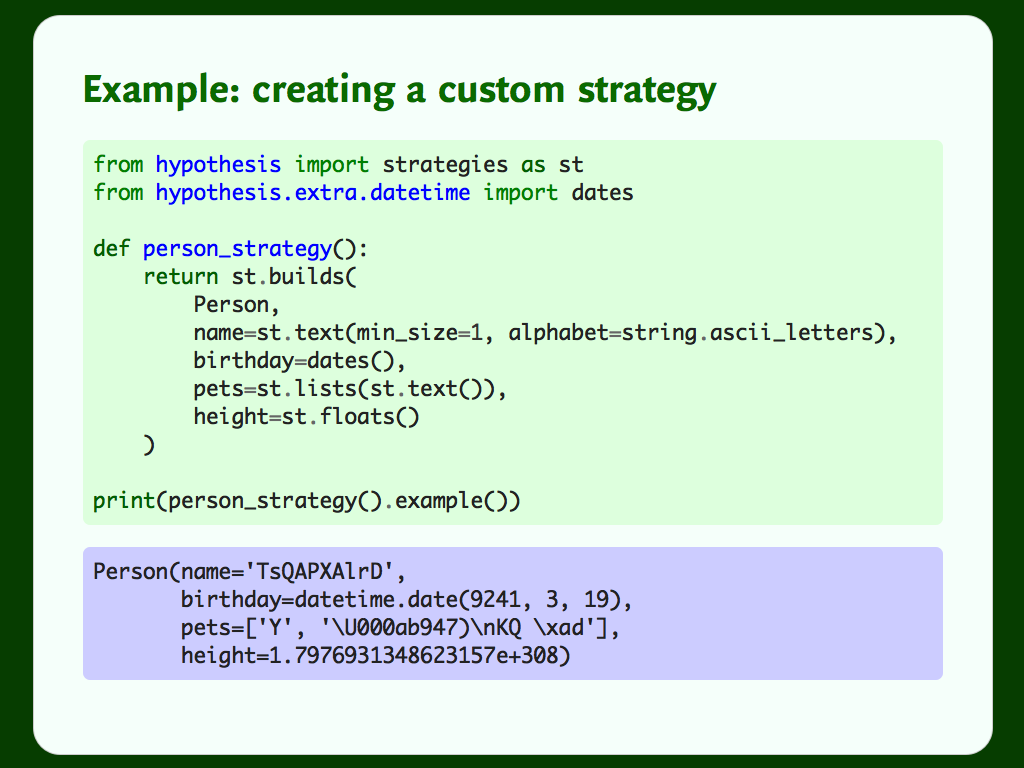
Next, let’s sort out birthdays. This example comes from the year 9241. I feel like if a time traveller comes back from the future, they won’t be signing up for Facebook for Pets.
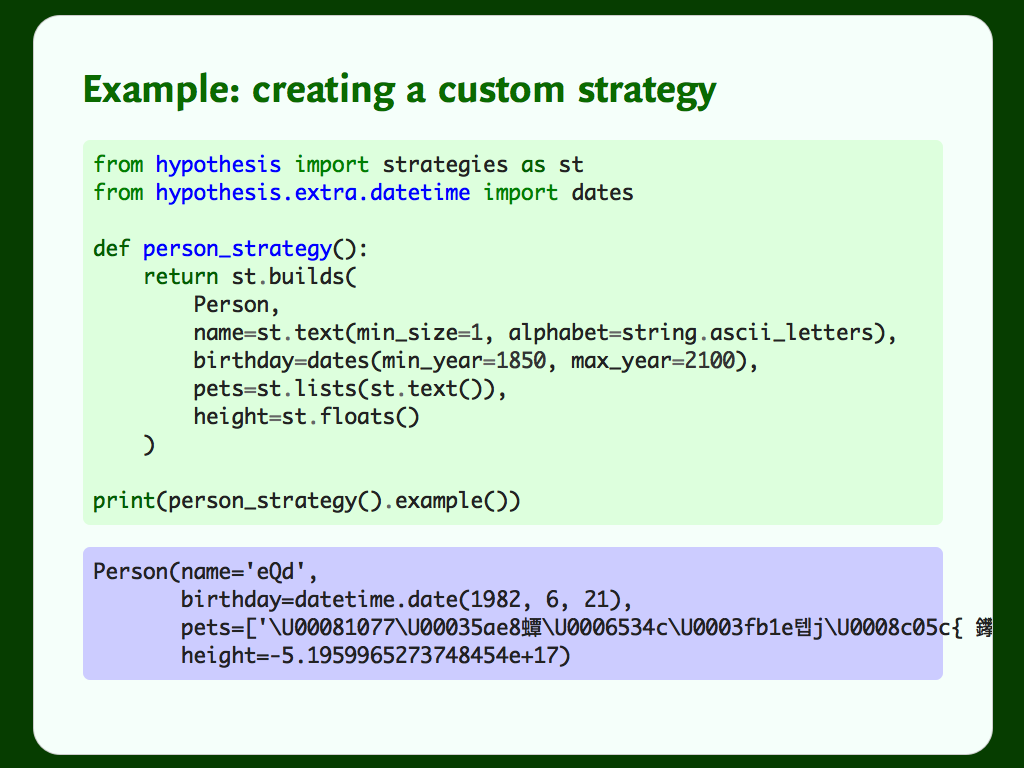
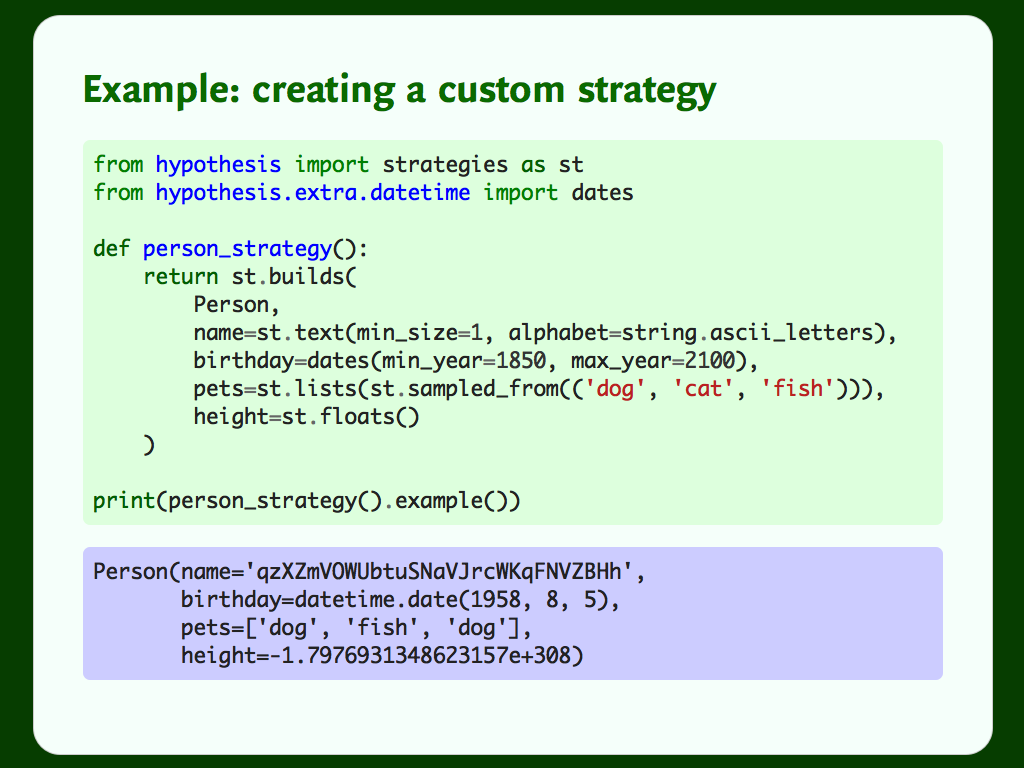

In just a few lines of code and config, we’ve glued together Hypothesis’s strategies to generate examples from a custom class, and constrained it to give examples to match our use case.
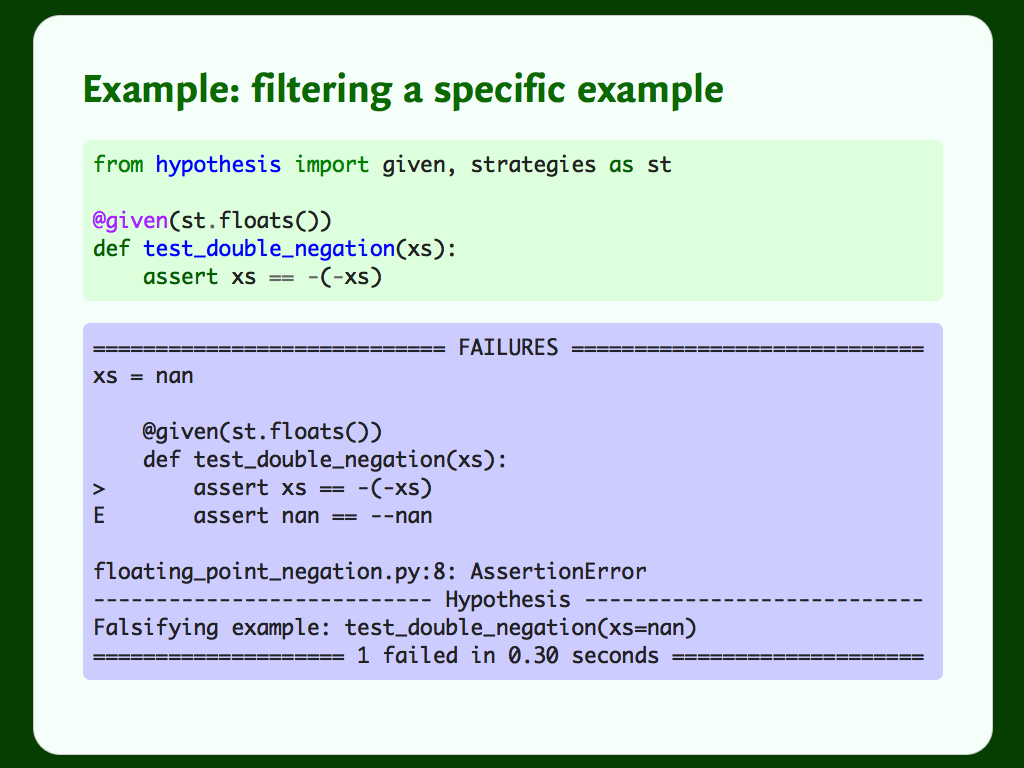
Here’s a test that anybody sensible would expect to pass – reversing the sign of a number twice gets us back to the original number – but floating numbers are horrible. NaN has the fun property that it’s not less than or equal to itself, so comparing NaN to NaN will fail.
Hypothesis prints us this nice output showing us the counterexample, and raises a failure in our test runner.
But if we decide that Hypothesis has found a silly example, how can we exclude it?
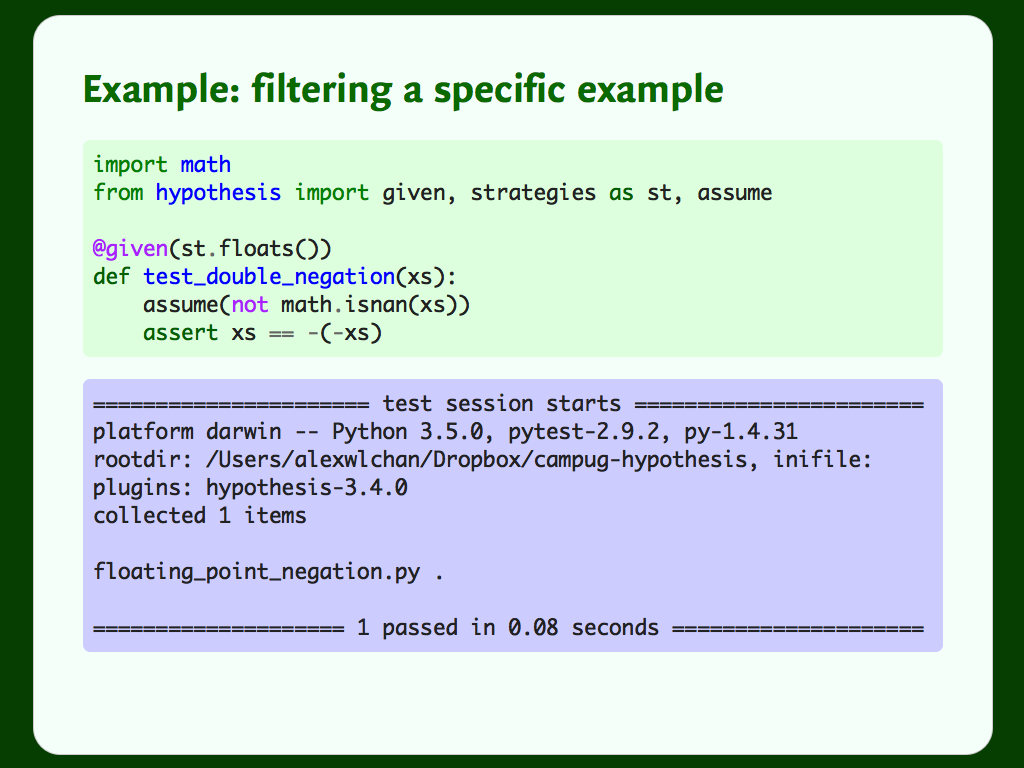
Once we exclude that bad example, the problem goes away, and the test passes.

When your application deals with complex spaces like floating-point numbers, or Unicode text, Hypothesis is an invaluable testing tool. It can go out and find examples that you’d never think to test yourself.
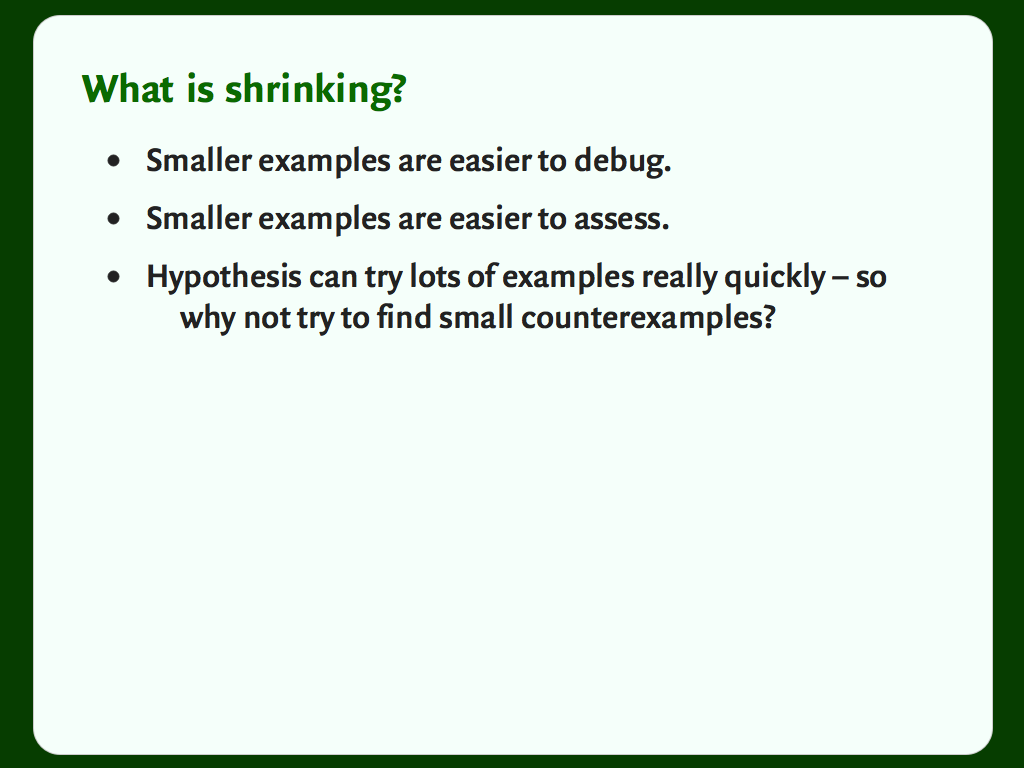
When we find a bug, we want to reduce it to a minimal failing example. A small example is easier to debug and reason about, and generally easier to assess. There are tried-and-tested techniques for stripping down examples: try smaller values, reduce the size of lists, binary debugging, and so on.
Hypothesis’s strategies know how to make smaller examples, and Hypothesis can try lots of examples really quickly. So when it finds a failing example, Hypothesis doesn’t just show you the messy first example. It tries to shrink the example, and find the smallest failure it can. This gives you much nicer results.

It’s not surprising that it fails, but the counterexample is really small: there isn’t a simpler example that still triggers this bug.
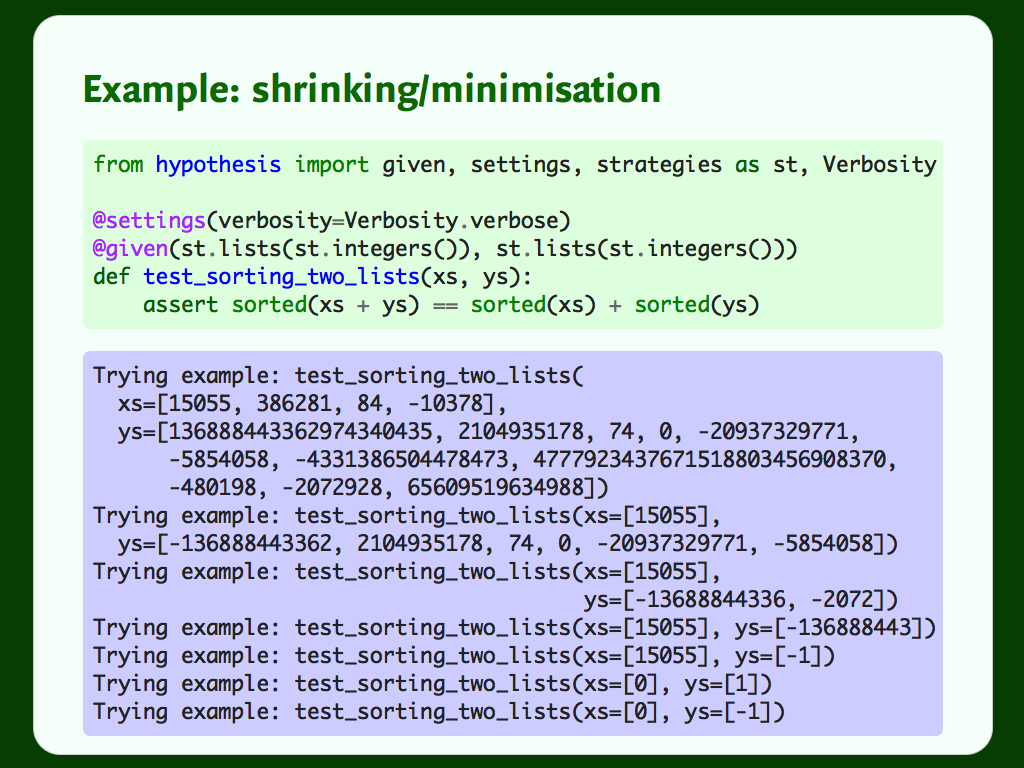
It starts reducing the size of the lists, discovering it doesn’t need many elements to repro the failure. Eventually it gets down to one element in each list. Then it tries cutting down the value in each list. It actually overshoots, and tries xs=[0], ys=[1], an example which doesn’t fail, before finding the minimal example that it presents to the user.
Doing this shrinking is possible by hand, but it’s another example of work we can push off to the computer. I think it’s a really important feature of property-based testing libraries: it makes the bugs much more palatable to work with.
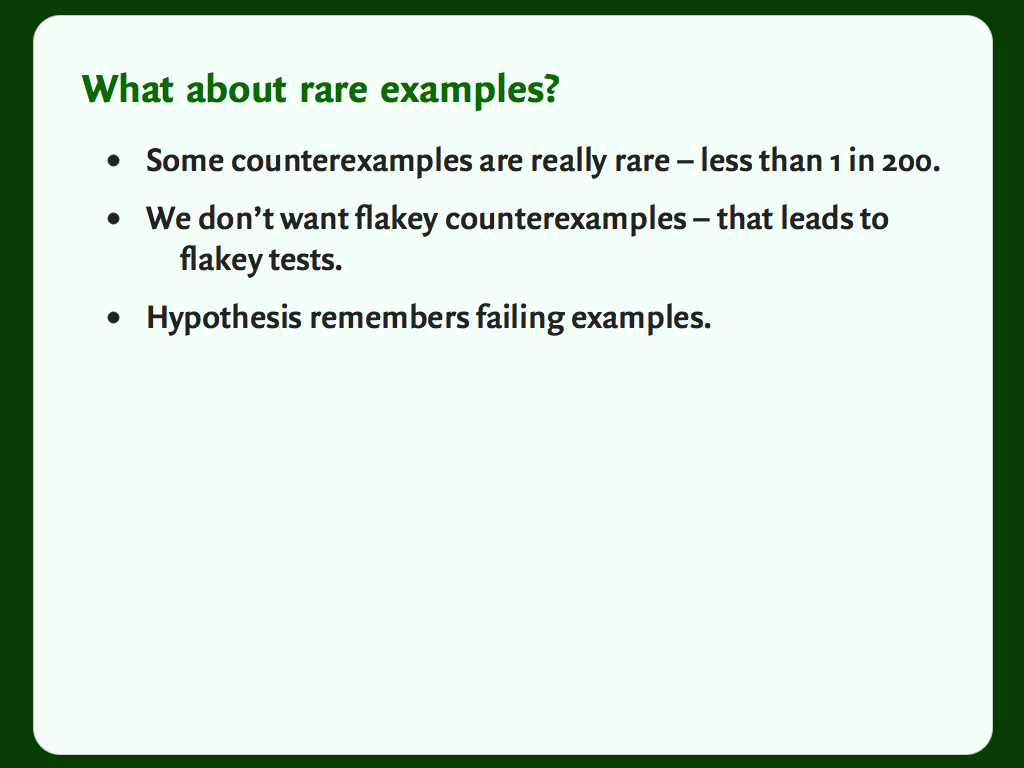
By default, Hypothesis tries 200 examples per test, but it’s quite plausible that we’d have a bug that occurs in less than 1 in 200 cases. If we were drawing truly random examples, a test would fail randomly, depending on whether it happened to draw a failing example. That gives us flakey tests, which are worse than no tests at all – they only act to cause confusion.
So Hypothesis keeps an examples database: a local file recording any interesting examples that it finds. When it runs a test, it starts by looking for prior examples in the database. This means that once it finds a failing example, it will persistently fail that test until you fix the bug, or tell Hypothesis that it was a bad example.
[Note: Hypothesis actually stores _every_ failing example that it finds, and gradually discards them when the test starts passing again. So if the process of shrinking causes Hypothesis to encounter more than one bug, it won’t forget. This was a question on the day.]
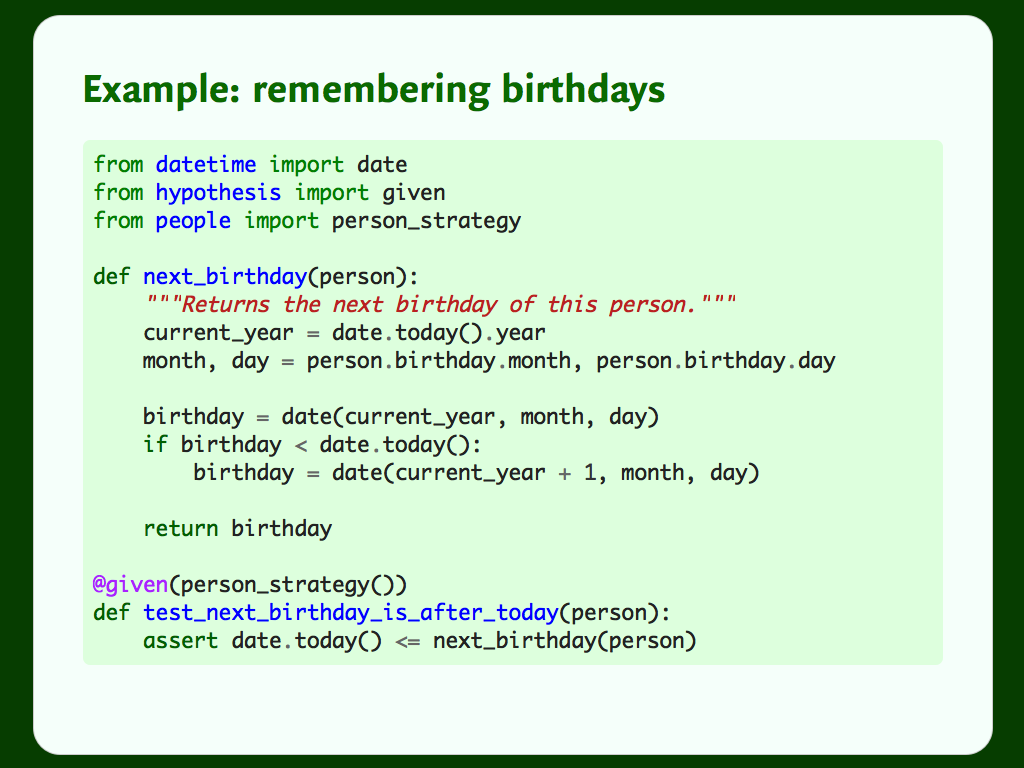
I keep forgetting my friends’ birthdays, so I’ve written a function that tells me when somebody has their next birthday. There’s a bug in this code, specifically this line:
birthday = date(current_year, month, day)If somebody’s birthday is 29th February, this will throw an error. But people with that birthday are comparatively rare – only about 1 in 1000 birthdays fall on that day.
(This example is based on a very similar bug that I wrote two years ago, and which we only noted this past spring.)
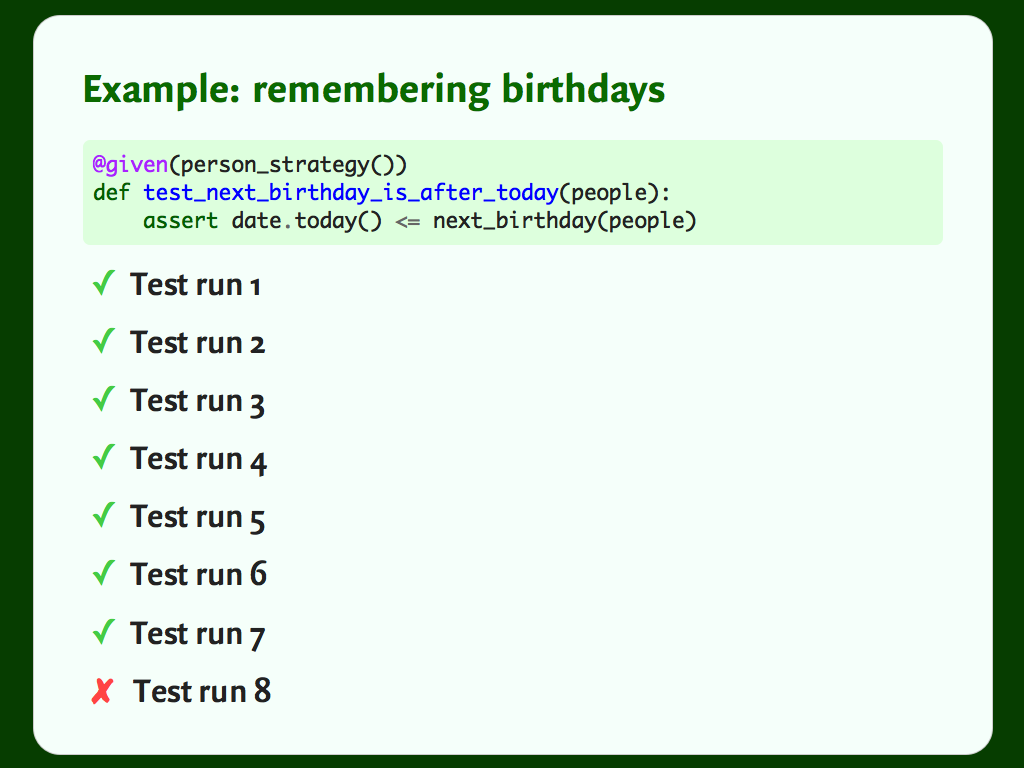
When I ran this before the talk, it took eight runs before it found the bug – but it did indeed find it.
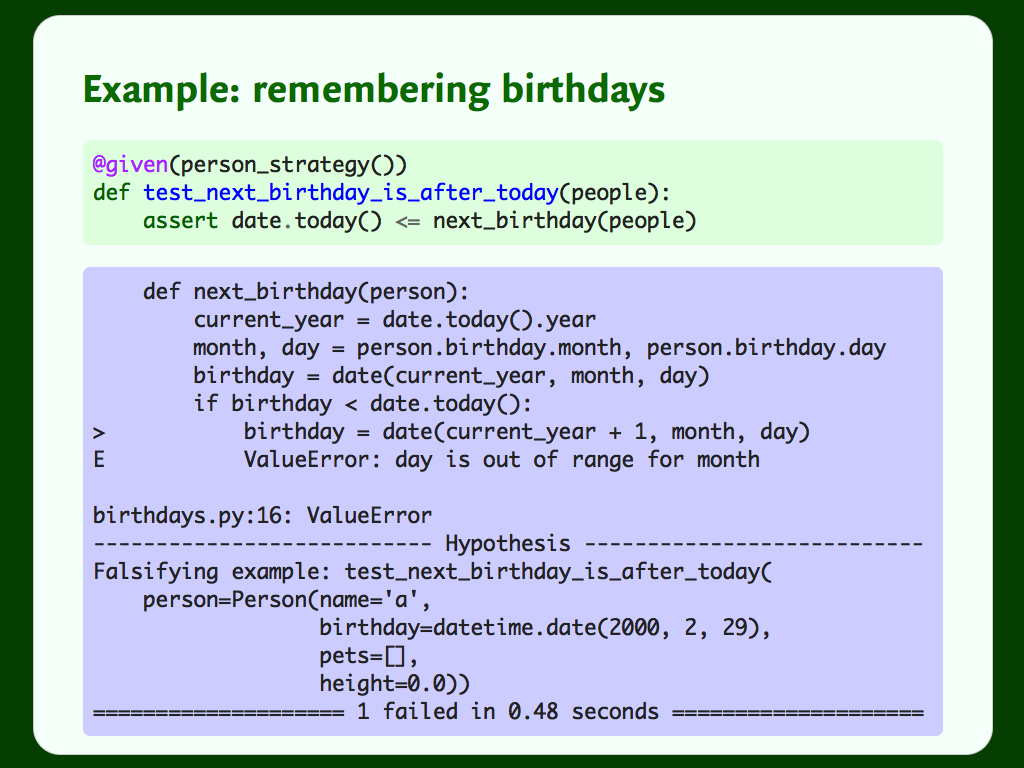
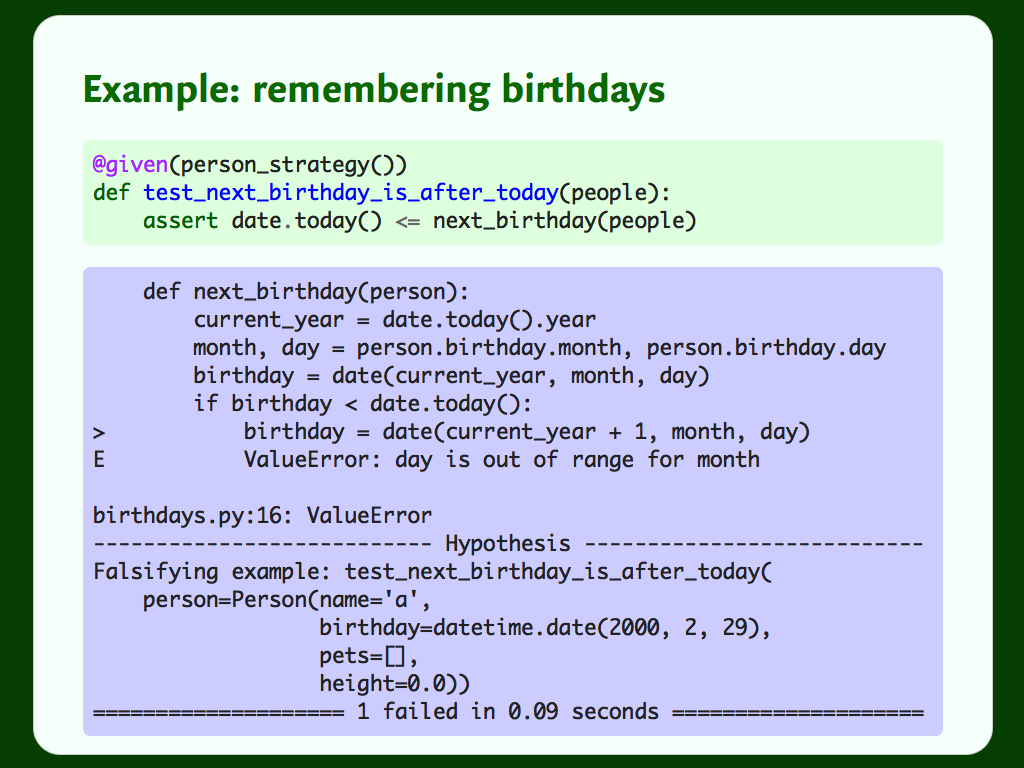
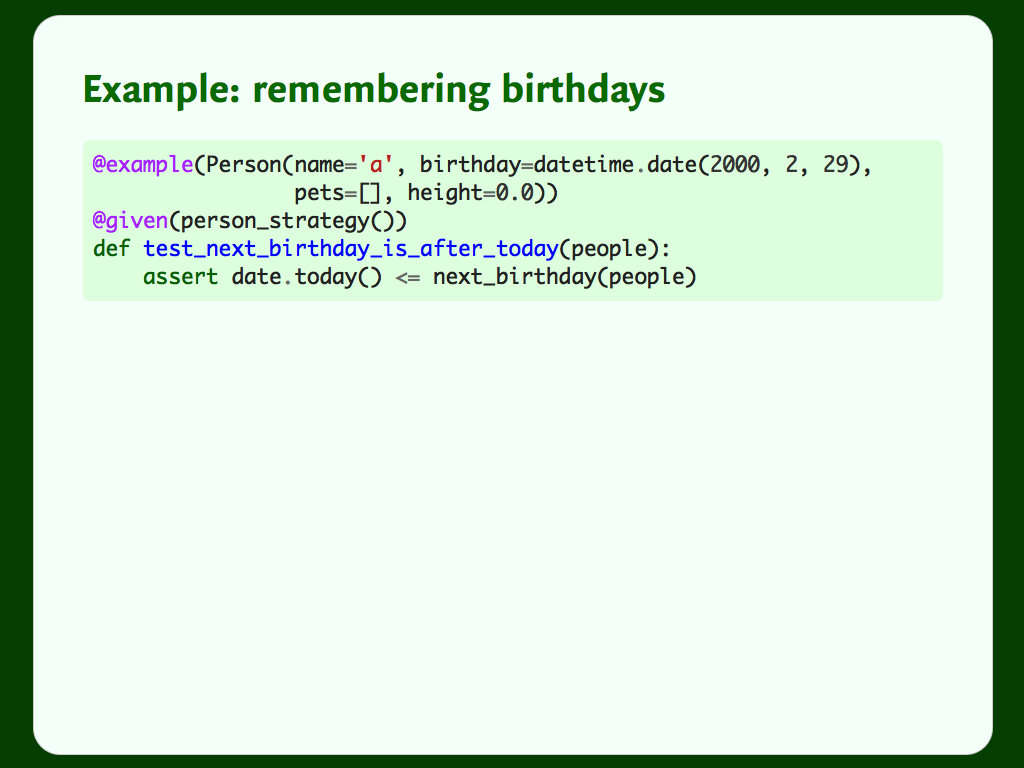
We can easily use the @example decorator to capture this example, and this means Hypothesis will always try this example, in addition to the random examples from the strategy.
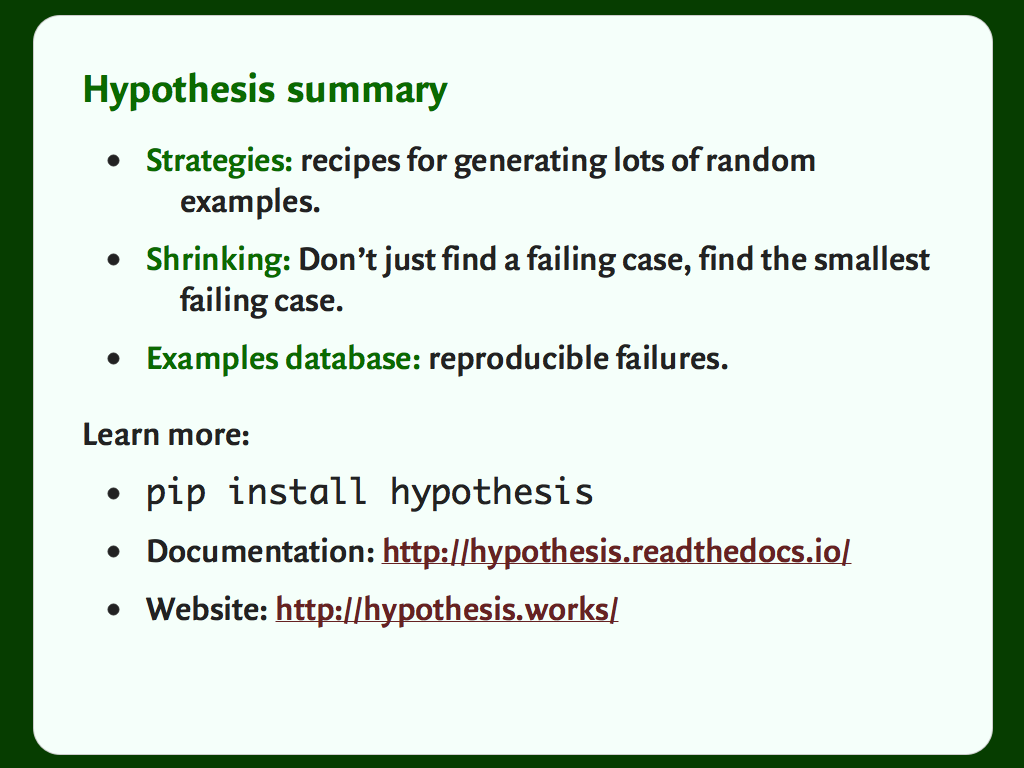
So that’s the features that distinguish Hypothesis from generating random examples. It enables a very powerful style of testing, and I have yet to throw it at a codebase and not see bugs fall out.
Hypothesis is available from PyPI. There’s really good documentation on ReadTheDocs, and lots of articles about this style of testing on hypothesis.works. This includes a list of property-based testing libraries in other languages, and how you can hire David for training and support.
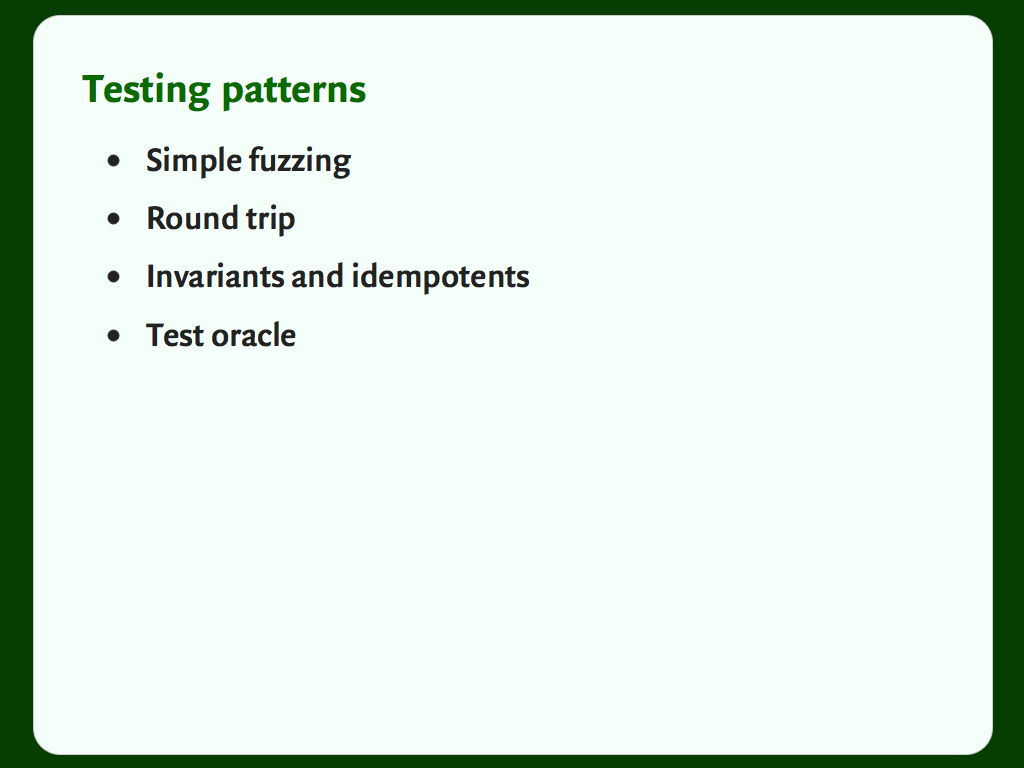
Often when I show people this style of testing, they get excited and think it’s cool, but don’t know where to get started. Now I want to show you some simple patterns for getting started with property-based testing.

Use Hypothesis to throw random data into your function. See what happens. Along the way, you’ll have to think carefully about exactly what sort of input your function takes.
Then start making simple assertions about the output. Does your function return anything? If so, make an assertion. Can your function return None? If not, make an assertion. Does your function return a consistent type? Make an assertion.
This is small stuff, but it starts to expose cracks in your code.
We’ll come back to this idea later.

This is particularly useful any time you have to do encoding or decoding of data, or if you’re writing any sort of serialisation code.
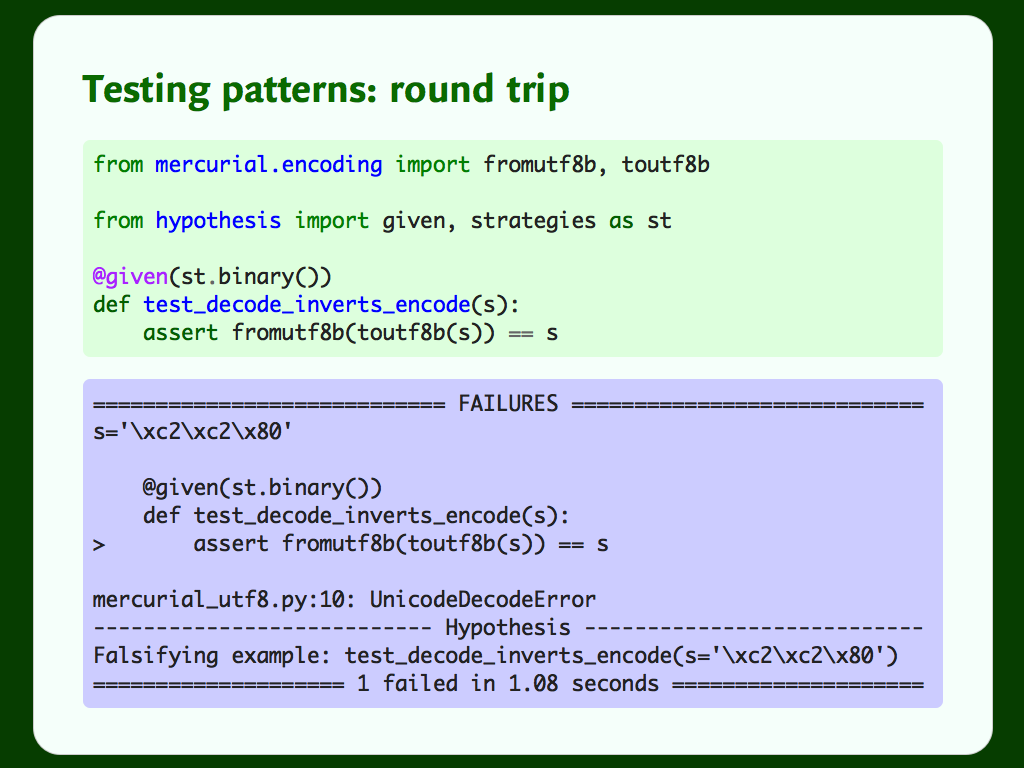
When they were tested with this pattern, it flushed out at least two bugs in the UTF‑8 handling. Two bugs from three lines of code.
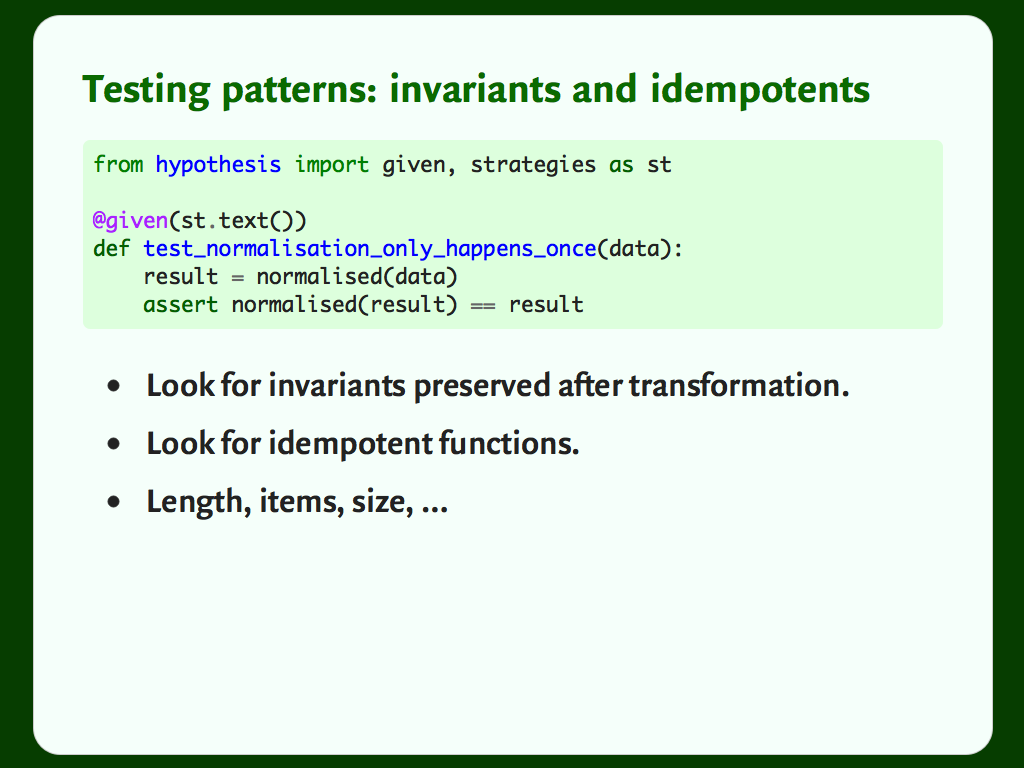
In the same vein, look for idempotent functions – functions whose effect can only be felt once. For example, here I’m normalising text before I save it in a database. The normalisation only needs to be applied once, so if calling it a second time changes the output, something’s gone wrong.
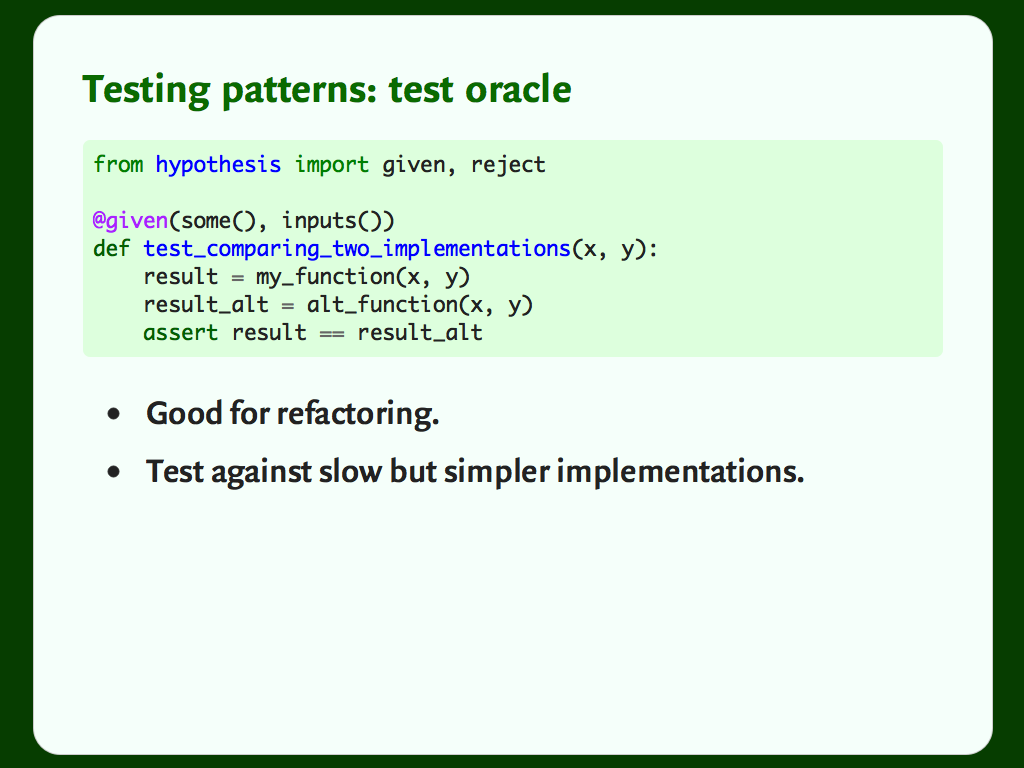
When we use random examples in our tests, we can’t say exactly what the output should be when we run the example in our function – unless we have a second implementation of the function. Then we can compare the results.
This is a really good pattern if you’re refactoring or reimplementing old code. You can ensure that both implementation have the same results, and then you know you’ve written a true replacement.
Also works if you can find a simpler, easier-to-check implementation that’s unsuitable for production (for example, a slow but simple implementation).
But there are lots of other ways to use it, which will vary depending on your code. What defines “correctness” in your tests? If you can answer that, you usually have enough to start writing this sort of test.
This is something you can put into practice straight away. You can add these to your existing unit tests immediately, and start reaping the benefits of better coverage and confidence.
Imagine a database. We can do reads, and we can do writes. We might test both operations in isolation, but how do we know the database works end-to-end? How do we know there isn’t some series of reads and writes that gets it into an inconsistent state?
How can we test that a program works? We could hard-code a series of steps through the program, but we’re back to square one. Could we get the computer to do some randomization for us?
This is a somewhat experimental part of Hypothesis. I haven’t seen it used much in practice, but I think it’s a really interesting idea.
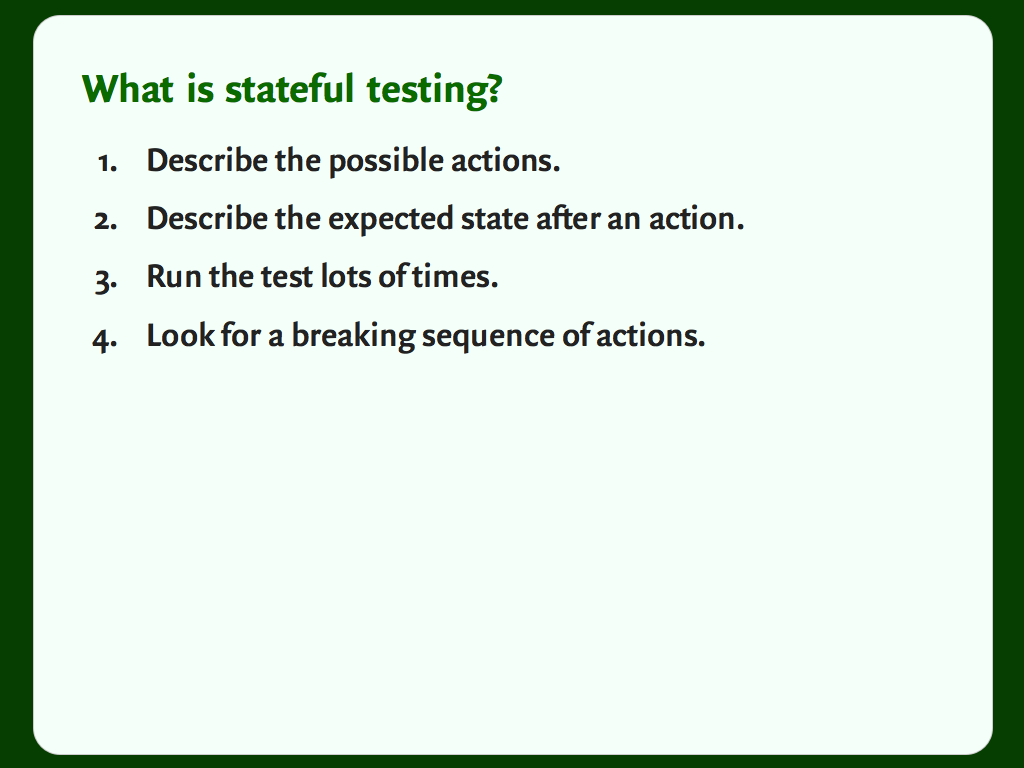
With that set up, we let Hypothesis loose. It tries the actions in lots of different orders, trying to find something that gets the system into an inconsistent state. And like in part 1, it’s going to be somewhat intelligent about the failures it finds.
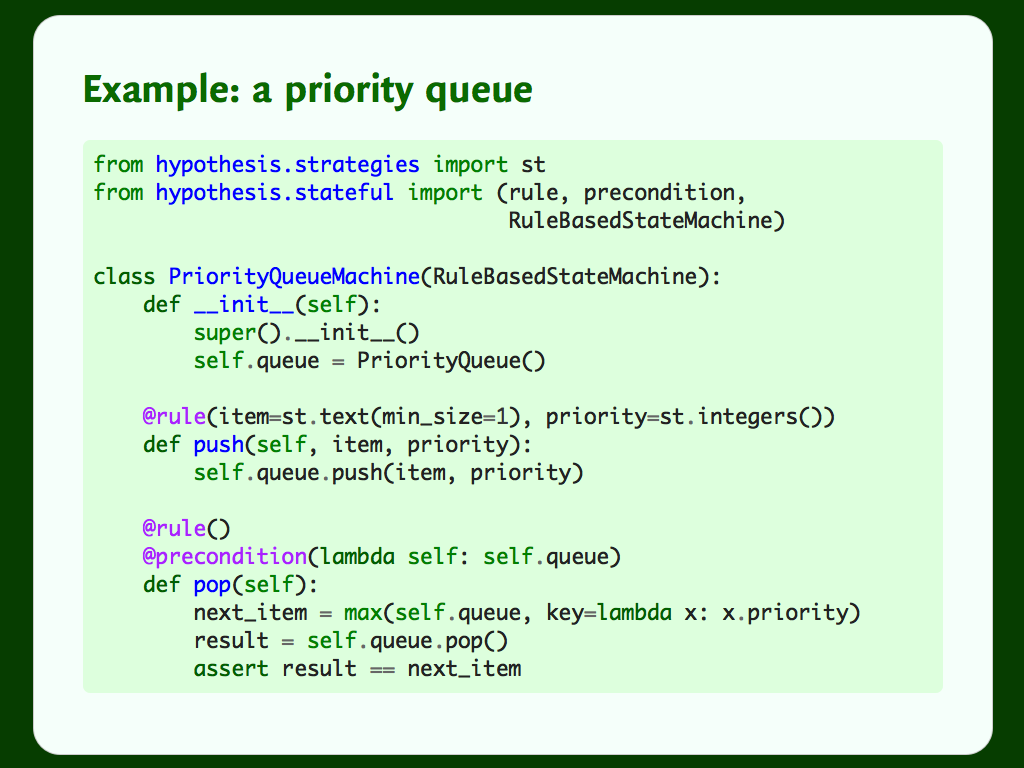
Here’s a test for a simple priority queue. Each item on the queue has a label and a priority. We can add (“push”) items to the queue, or get the item with the highest priority (“pop”).
The @rule decorator tells Hypothesis about these two actions we can take, and the relevant inputs – for the push action, this means a label and a priority for the new item. The @precondition decorator on the pop action tells is that we can only pop if we have a non-empty queue. Popping from an empty queue probably gives an error, but not one that’s very interesting.
Within the pop action, we’re computing the most important item on the list, and then we check whether the queue returns that item. If not, that’s an error.
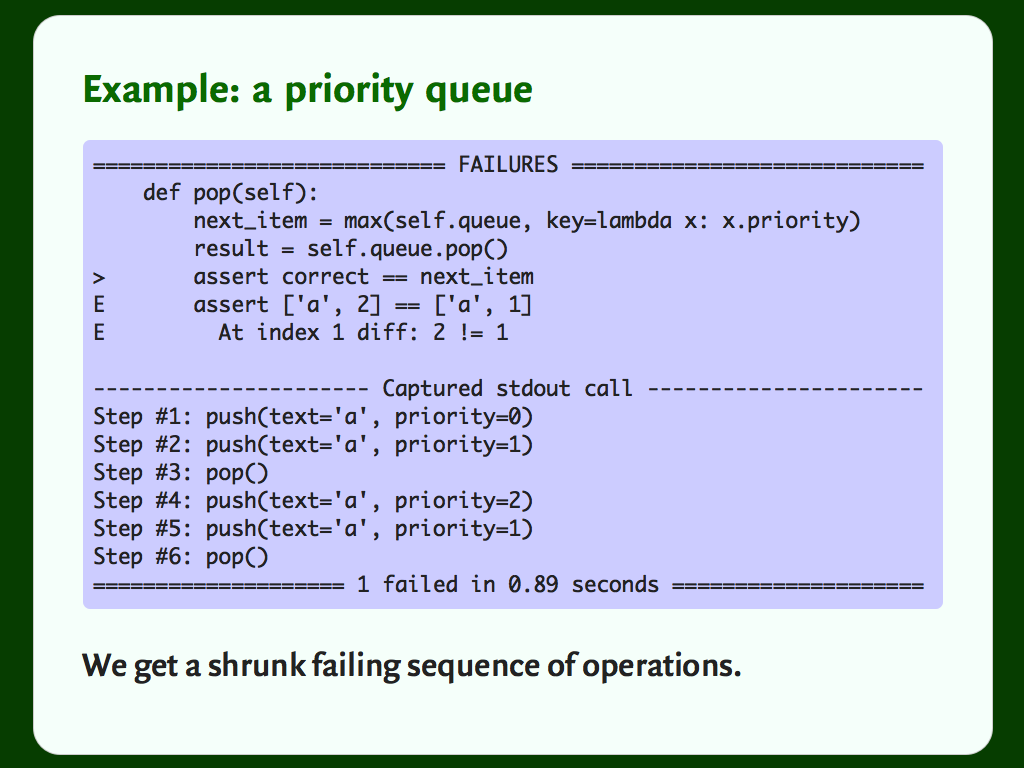
Instead, it gives us a series of steps that reproduce the issue. Having an example workflow to produce the error is much more useful. And Hypothesis applies its shrinking smarts to try to give you a small repro. It won’t necessarily be minimal, but it’s usually pretty small.
(Subtext: if you are doing this, please write about it!)
[Note: I haven’t asked David, but I think some of the stateful testing work in Hypothesis is at least partially inspired by ScalaCheck. I’ve been looking at Scala examples for inspiration in this area.]

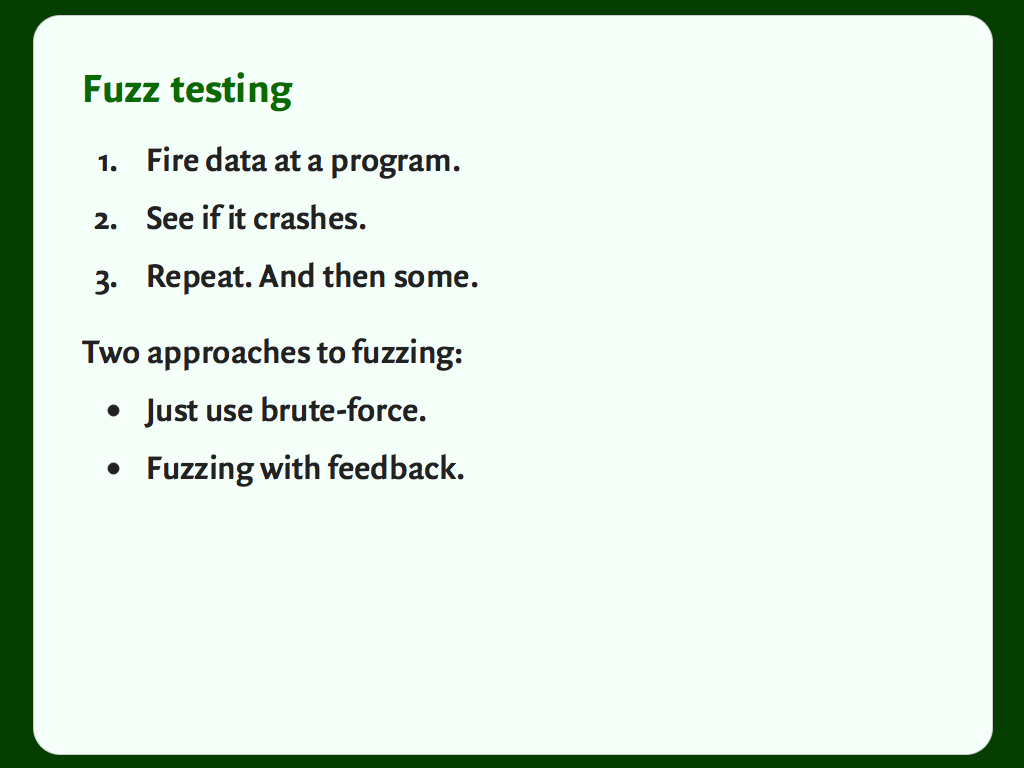
There are two ways you can fuzz:
Brute-force. Just guess what sort of inputs might be interesting, and try those. This is the technique used by anybody looking in from the outside, who only sees the public interface to your program.
Fuzzing with feedback. We have a massive advantage over our adversaries, because we have our own source code. We can see not just whether the input causes a crash, but which path it takes through our program.
This turns out to be a very powerful line of attack. Compared to the number of possible inputs, there are relatively few distinct paths through our code. If we could find them all, and fuzz each of them in turn, we’d be able to shake out a lot of bugs.
We’re going to look at this second path.
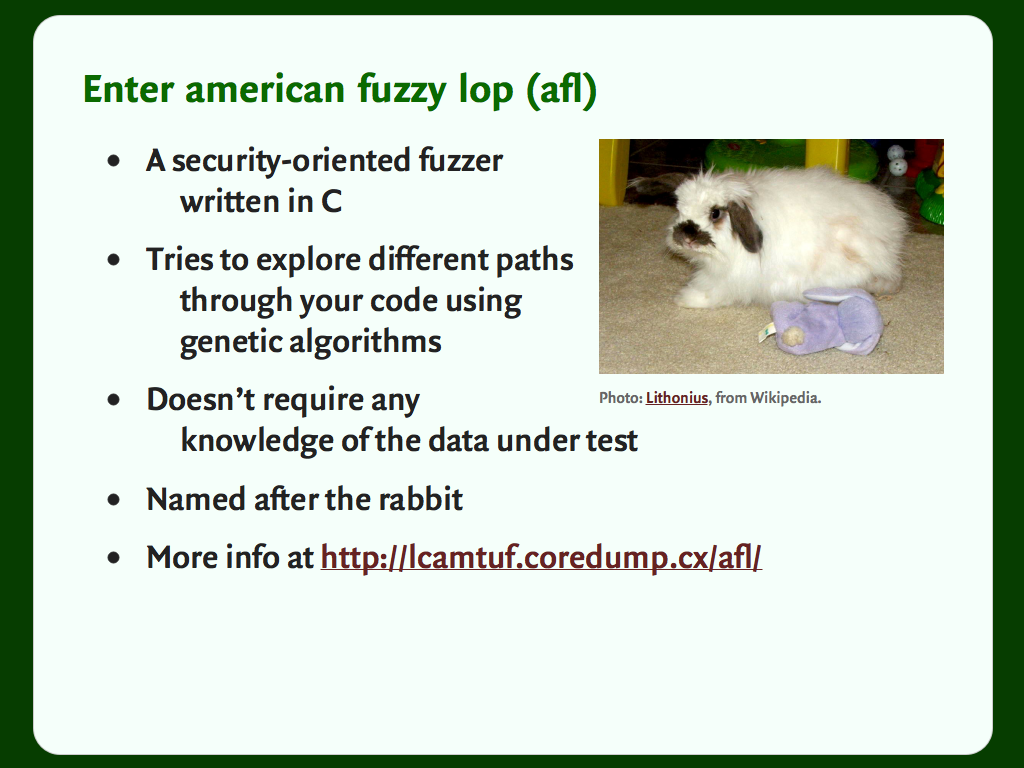
Because it learns from the structure of your program, it doesn’t need to be know anything about the sort of input data its testing – it can learn entirely based on how your code works. This is very powerful, because it chooses its inputs based on what your code is actually parsing, not just what you think it does.
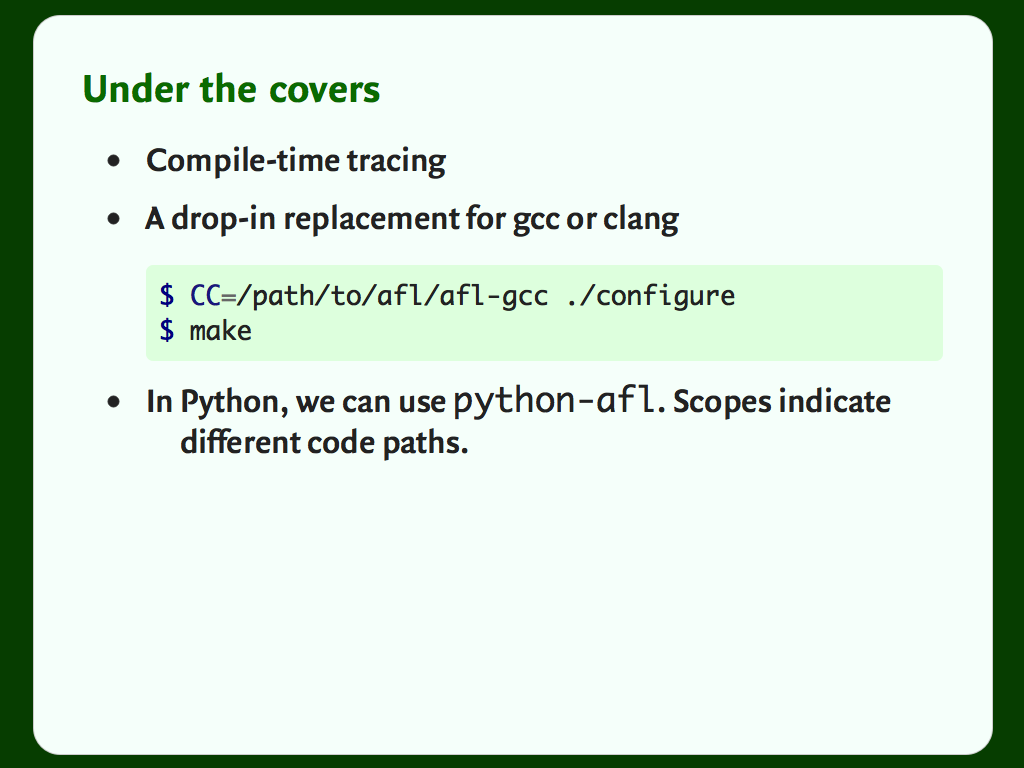
It uses compile-time tracing. You recompile your C program with a special version of GCC or Clang, and this inserts tracing statements. This tracing helps it know when it’s gone down a different path, and so found an interesting new category of input.
That won’t work in Python, because Python isn’t a compiled language. Instead, we can use python-afl, which applies the same principle, but to Python code.
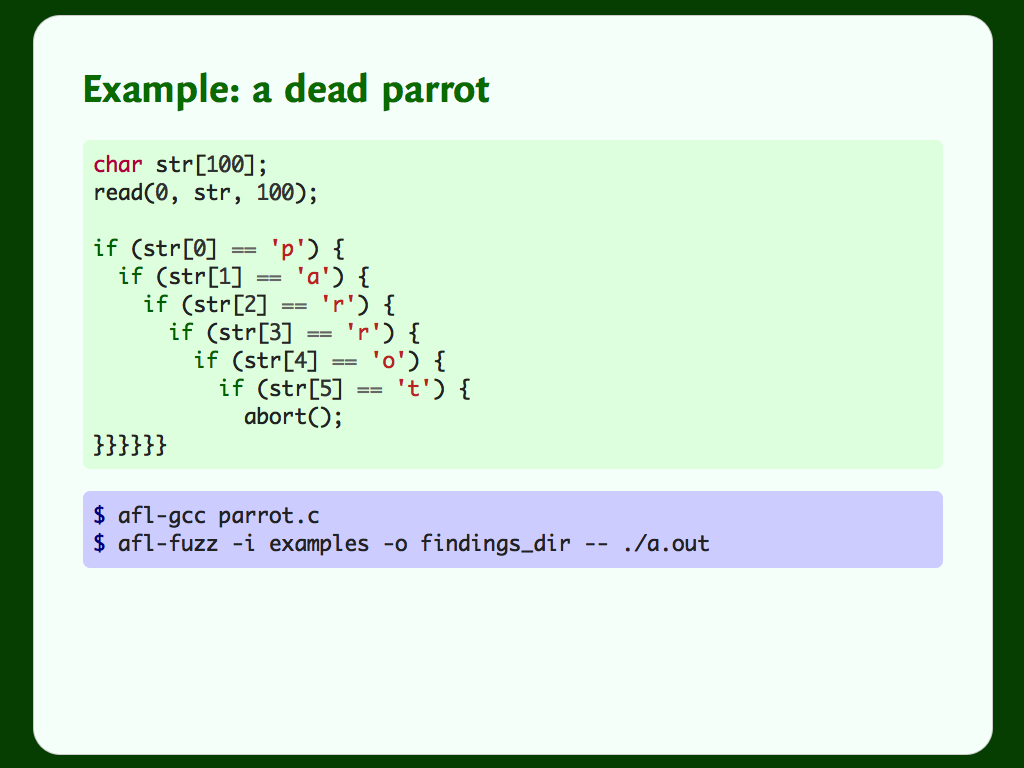
We give the fuzzer a directory of inputs (I just used helloworld), and a directory to write its results. Then the fuzzer goes to town.
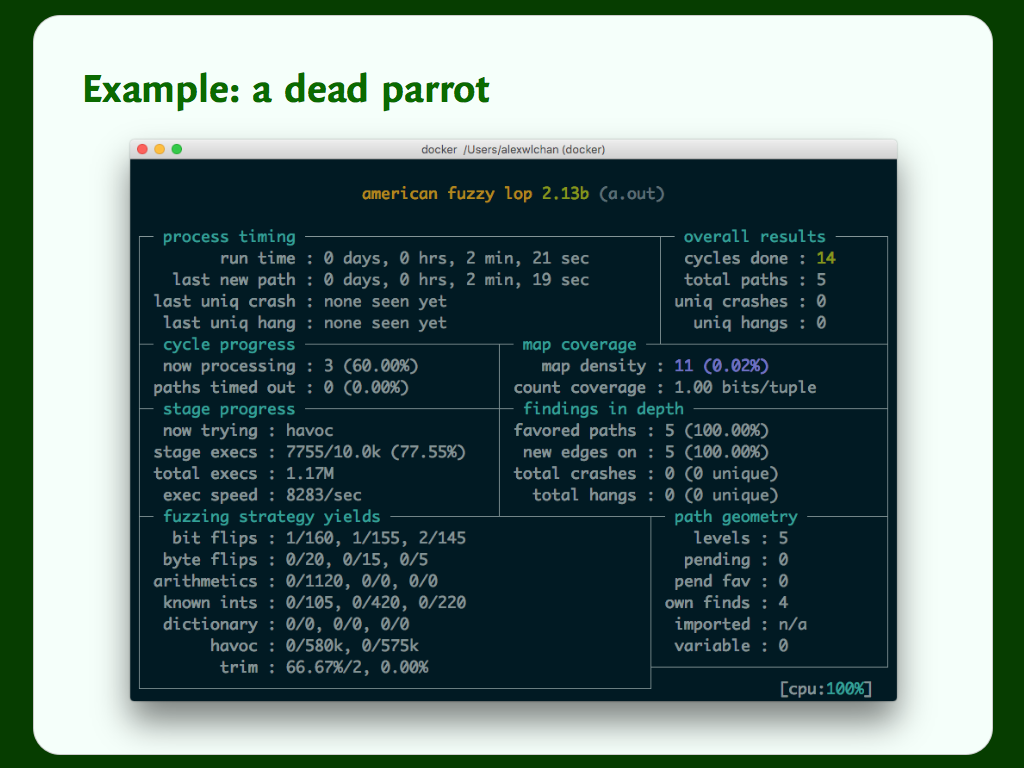
After just two minutes, it’s already tried over a million examples, and it’s just getting started. You can imagine how many inputs it might find if you run it for hours or days, which is the typical runtime for a fuzzer.
And it’s already got pretty close to our bug, having found five distinct paths through the code. It writes out a list of “interesting” inputs that it’s found, where an interesting input is one that takes you down a different code path. So far it’s found “hell”, “pell”, “pall”, “parl” and “parr”.
That gives you an idea of how powerful this is in its native state.

Again, our script reads from stdin, and we’re passing that to a function. This example comes from a blog post by Alex Gaynor, and it’s testing the python-cryptography library. This test exposed several bugs.
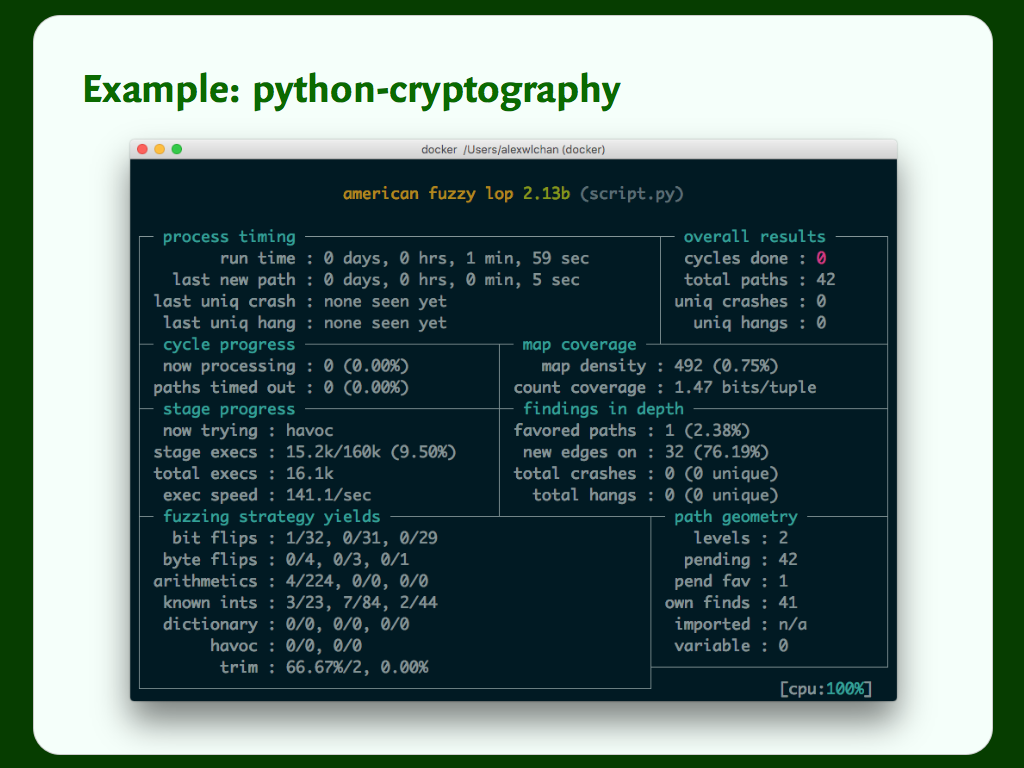
Not much to be done about this – in this case, Python is just slow.
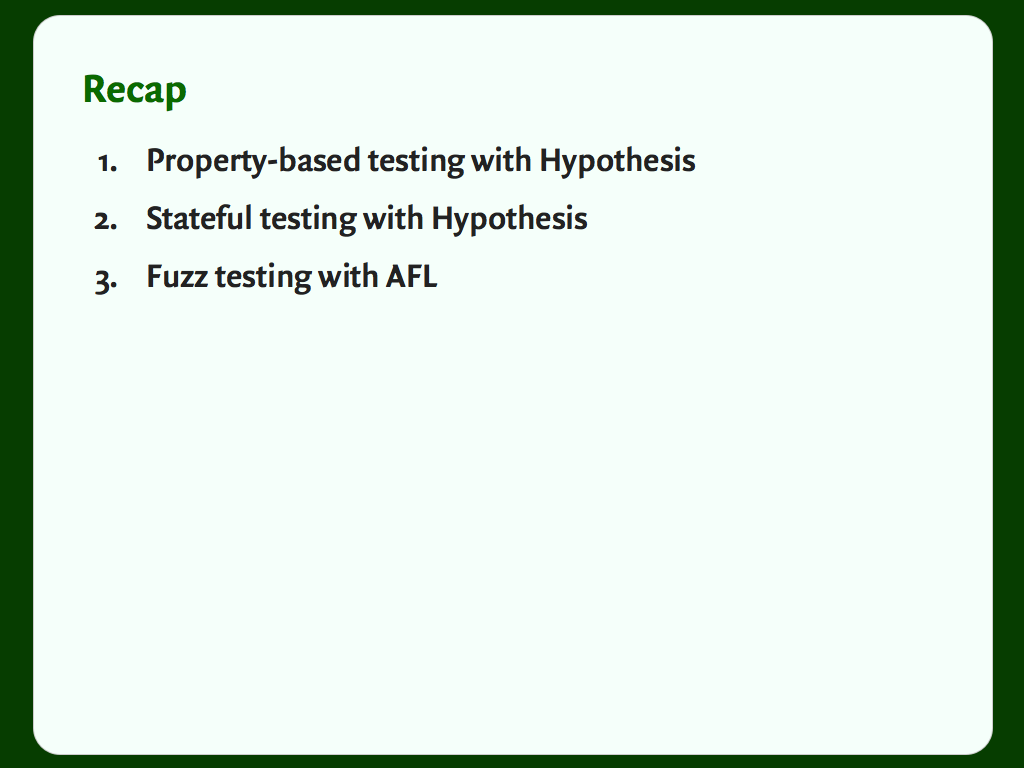
Property-based testing. Take your regular examples-based tests, and let the computer write your examples for you.
Stateful testing. Tell the computer how to use your program, and let it find ways to break it.
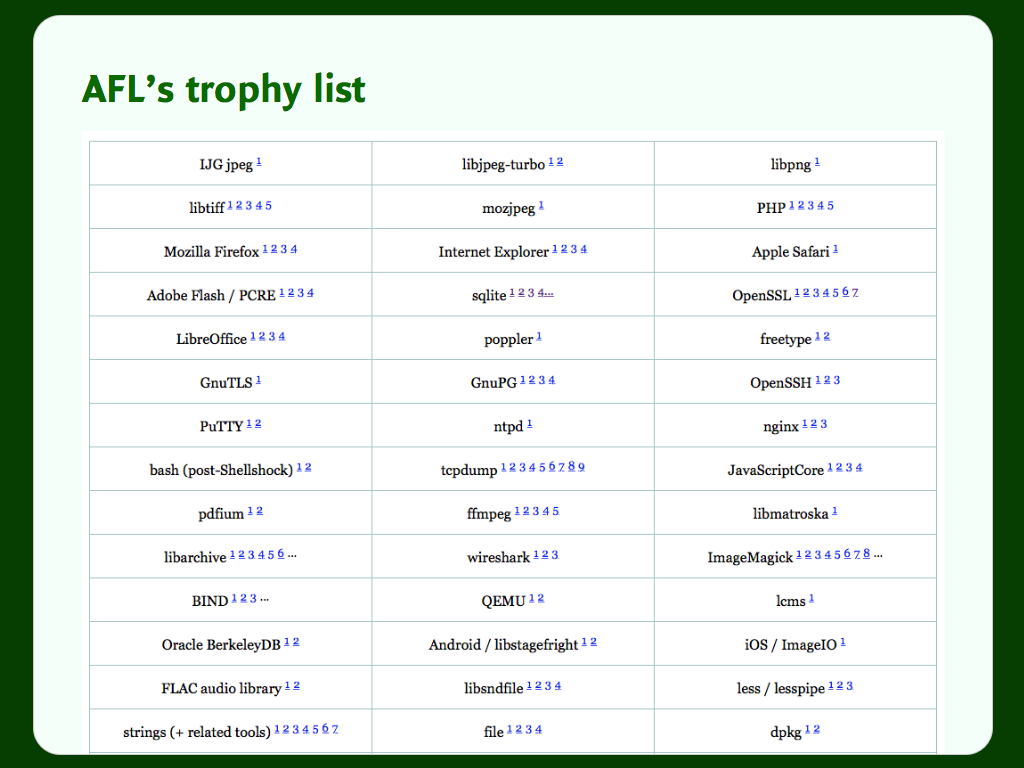
Fuzz testing with AFL. Give the computer a simple entry point to your program, and let it find interesting (and buggy) paths through your program.
You can get started with the property-based testing right away; the stateful testing and fuzz testing take a bit longer to get up to speed, but are definitely worth it. I would encourage you all to try it, and if you do, please write about it! I’d love to hear about what other people are doing, particularly with the stateful testing.
Thank you all for your time. I hope this has been useful.