Creating animated GIFs from fruit and veg
A couple of years ago, I wrote a blog post about looking through MRI scans of fruit and veg. I took some MRI scans by Alexandr Khrapichev from the University of Oxford, ran them through an image processor, and turned them into animated GIFs. They’re very pretty and mesmerising.
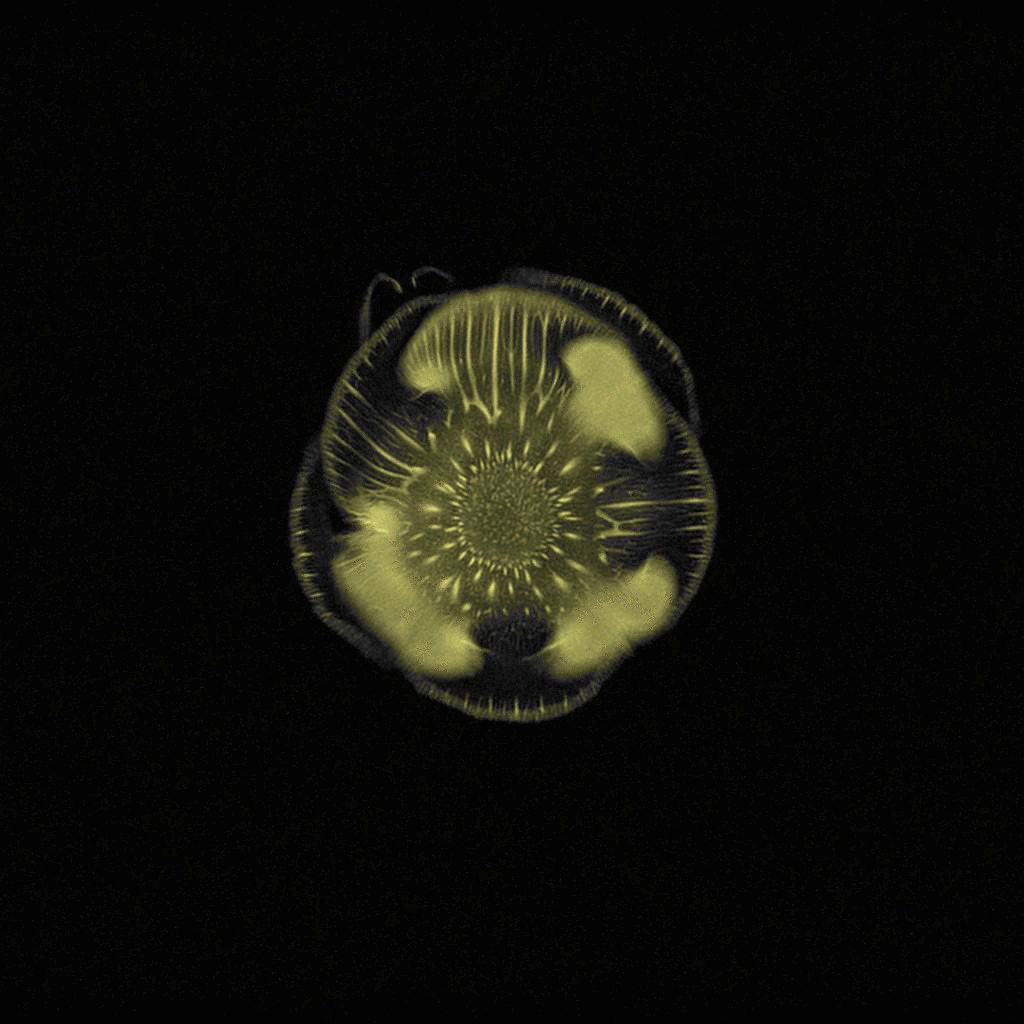
That post has dozens of examples, but my favourite is this view of an artichoke, which looks like some sort of portal from science fiction:
At the time, I meant to write a follow up post explaining how I created these images, but I never got round to it. I recently rediscovered the code while clearing up an old hard drive, so let’s go through it now. All of this code uses Python and the Pillow library, because those were my go-to tools for working with images when I wrote this code.
Khrapichev saved his scans as a single large image, with the individual scans arranged into rows and columns. This is the image he published:
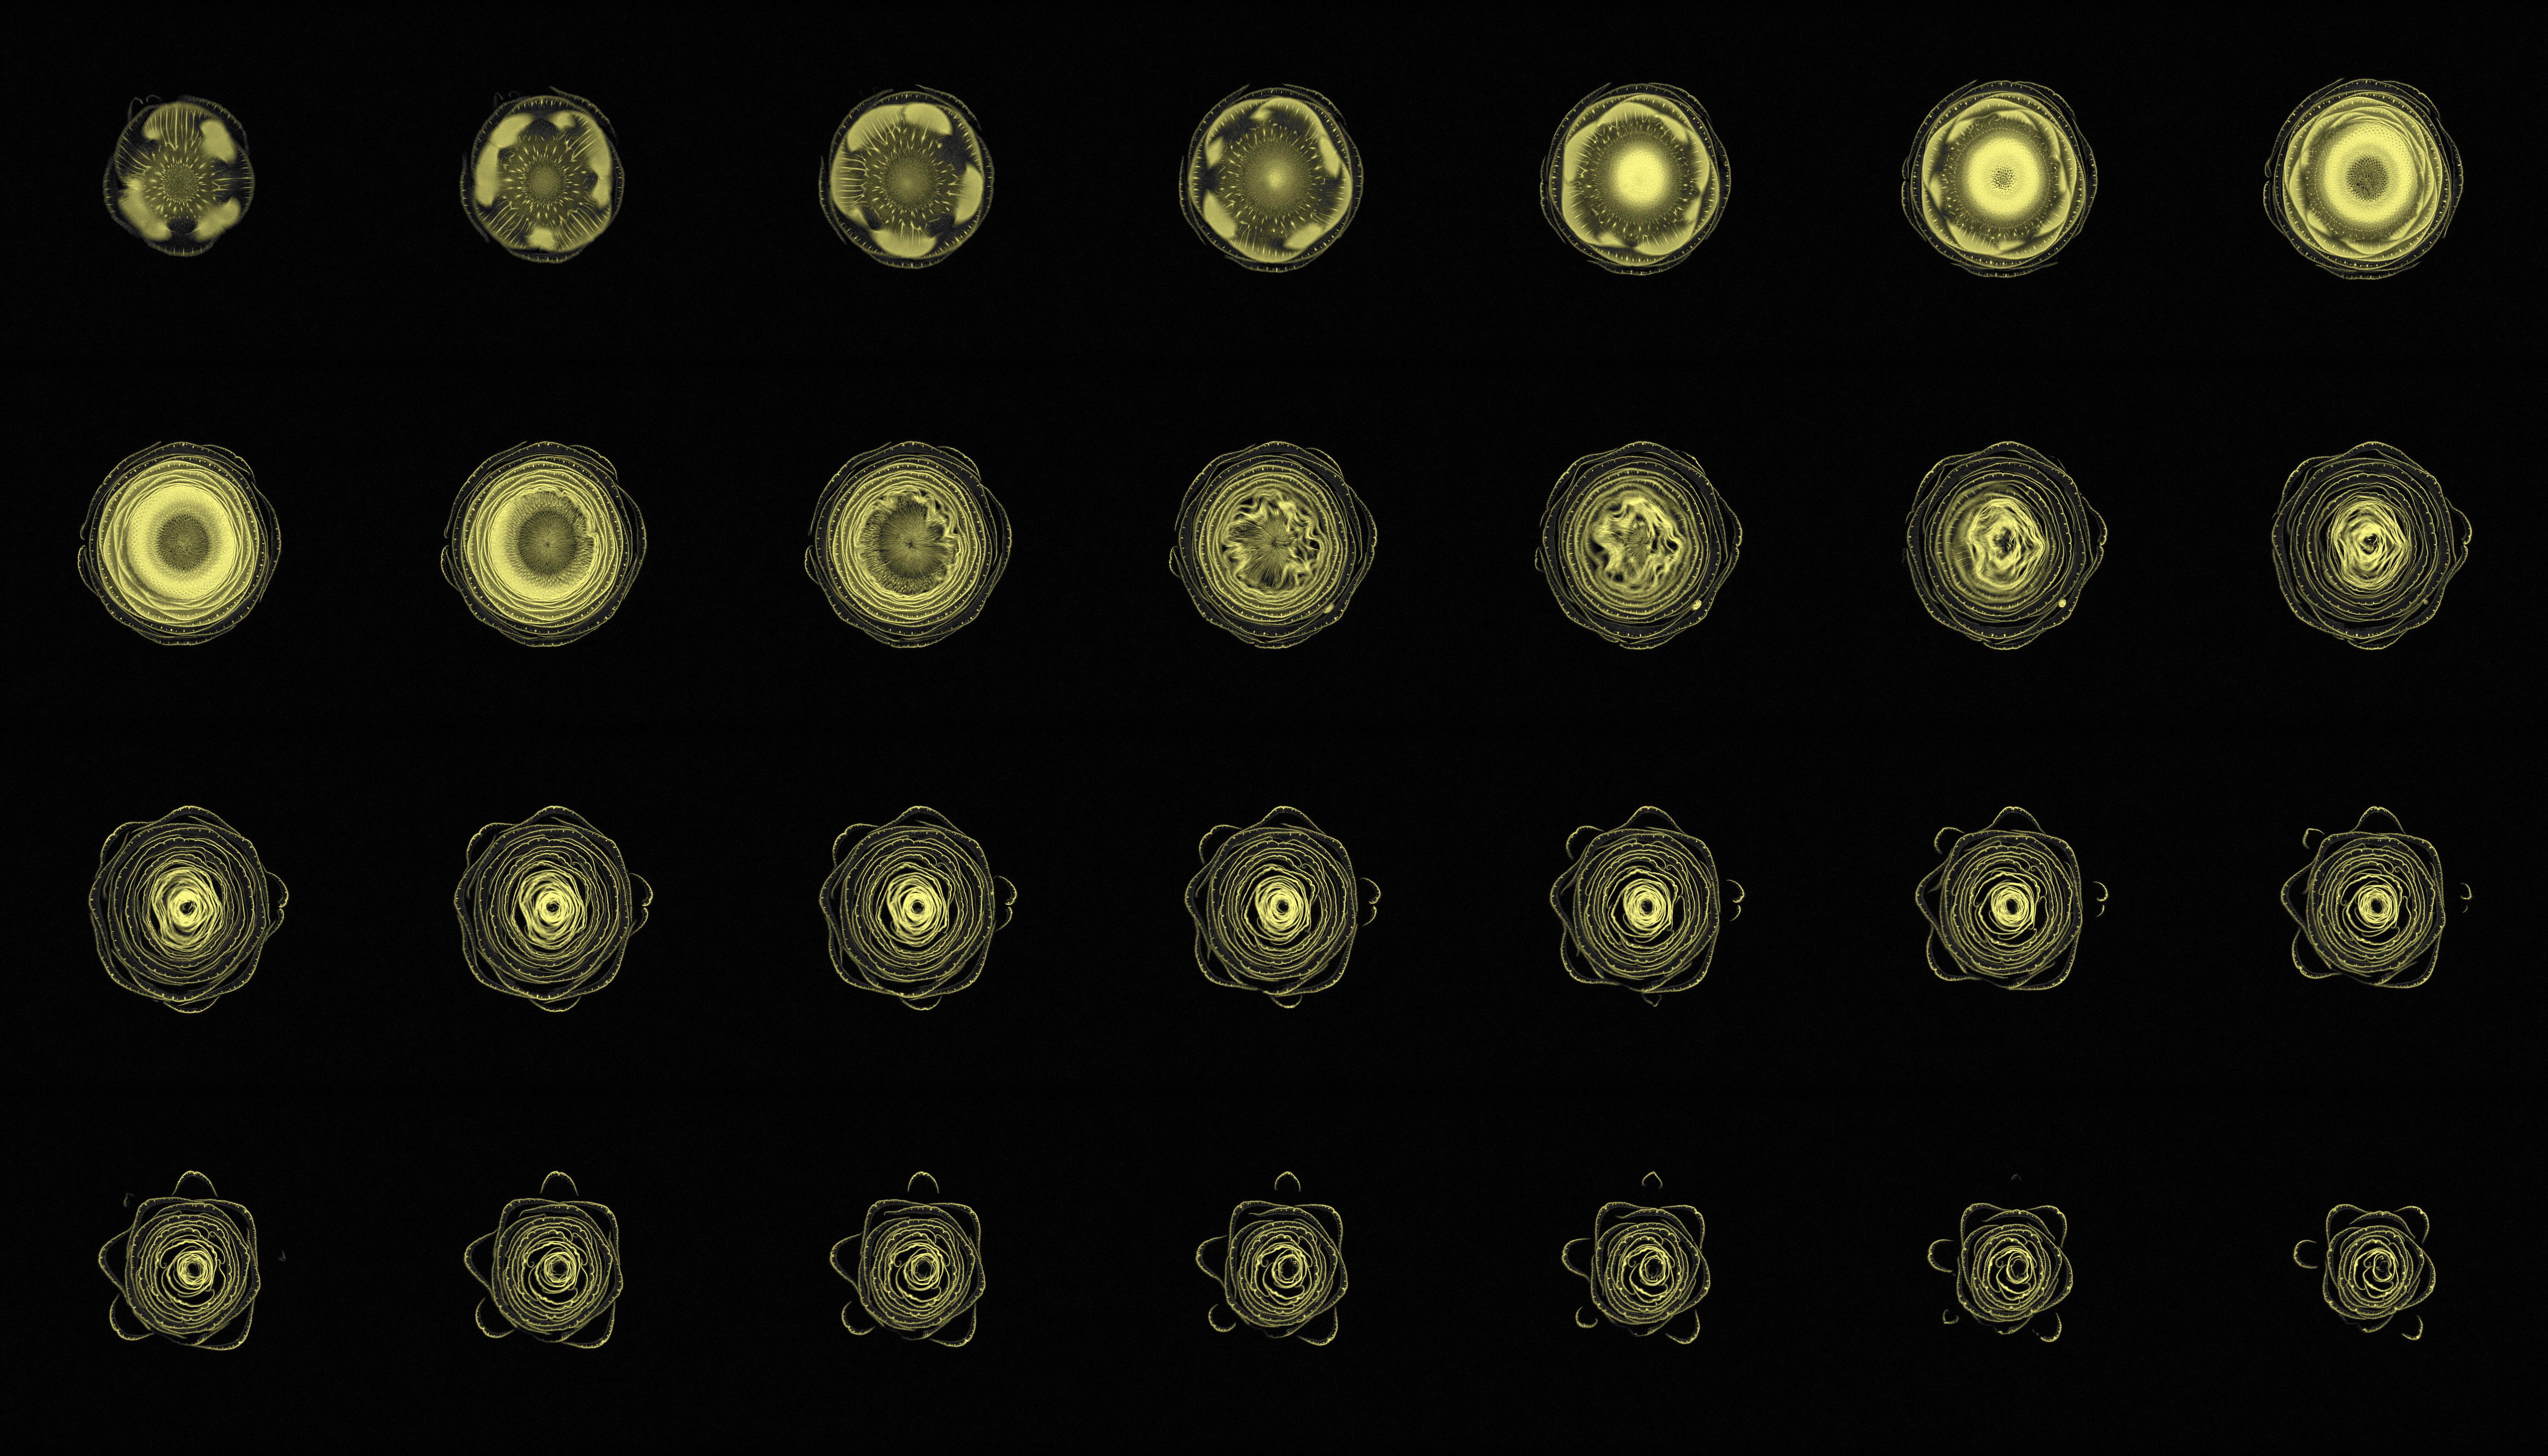
So we want to cut out the individual frames from this image, put them in the right order, then stitch them into an animated GIF.
First we load the image with Pillow:
from PIL import Image

im = Image.open("artichoke.jpg")
We can crop a rectangle from an image using the crop() function, which takes the four corners of the area we want to crop. For example, this code:
im_cropped = im.crop((500, 1000, 800, 700))
will extract this part of the image:

I started by writing a function that produces the 4-tuples that are passed to the crop() function. It moves from left-to-right, top-to-bottom, finding the coordinates of the crops:
def get_crops(im, *, columns, rows):
    column_width = im.width // columns
    row_height = im.height // rows

    for r in range(rows):
        for c in range(columns):
            x = c * column_width
            y = r * row_height
            yield (x, y, x + column_width, y + row_height)
and then I get the individual images like so:
individual_scans = [
    im.crop(c)
    for c in get_crops(im, columns=7, rows=4)
]
The exact number of individual scans varied from image to image (for example, the sagittal view of a pumpkin has 6 columns and 3 rows), so parameterising the crops was quite handy.

Now we save the individual frames as an animated GIF, which is a one-liner in Pillow:
individual_scans[0].save(
    "artichoke.gif",
    save_all=True,
    append_images=individual_scans[1:]
)
It’s possible to adjust the speed by passing a duration parameter, but the default seemed fine. I’m sure there’s more fun to be had by making the animation speed up or slow down at certain points!
You can download all the code from this post in this file:
And if you haven’t looked already, I really recommend getting a big monitor and reading my original post. There are pumpkins, parsimmons, passion fruit, and all sorts of other mesmerising images made entirely from MRI scans.